1968 Sportcraft C-Gull work boat project

electric603

Petty Officer 2nd Class
Joined
May 4, 2012
Messages
168
Re: 1968 Sportcraft C-Gull work boat project

Jc,
The splash well not fitting over the new transom seems to be a common theme with these sportcrafts. Bill434 had the same problem and had to cut his splash well too. I sanded 1/4" of thickness off my transom in the splash well area hopefully it will fit.
 

jigngrub

Fleet Admiral
Joined
Mar 19, 2011
Messages
8,155
Re: 1968 Sportcraft C-Gull work boat project

I like the lights!

Gel coat is a poly resin type product so I think all you need to do is sand it for a good bite.

You're going to need to make some fairing compound for patching and filling and it should work well on the snap holes too. The fairing compound can be made with either poly resin or epoxy resin. If you use epoxy resin, I like the SM fairing compoud powder filler. It makes a creamy smooth filler that's easy to sand.
 

maryhannaj

Chief Petty Officer
Joined
Sep 22, 2013
Messages
422
Re: 1968 Sportcraft C-Gull work boat project

Jc. Good pics. Nice job with dropping the cap. Sorry it didn't fit. But on the bright side, at least you know you have given her a better transom then what she had to start with. I do really like the lights. I prefer the round spotters over the rectangular ones on almost every application. And some pics of the chems would help alot. Thanks man. Your moving along really well.
 

jc55

Senior Chief Petty Officer
Joined
Nov 3, 2006
Messages
665
Re: 1968 Sportcraft C-Gull work boat project

That is great news Electric603. I tried to take every precaution, thanks for chiming in!

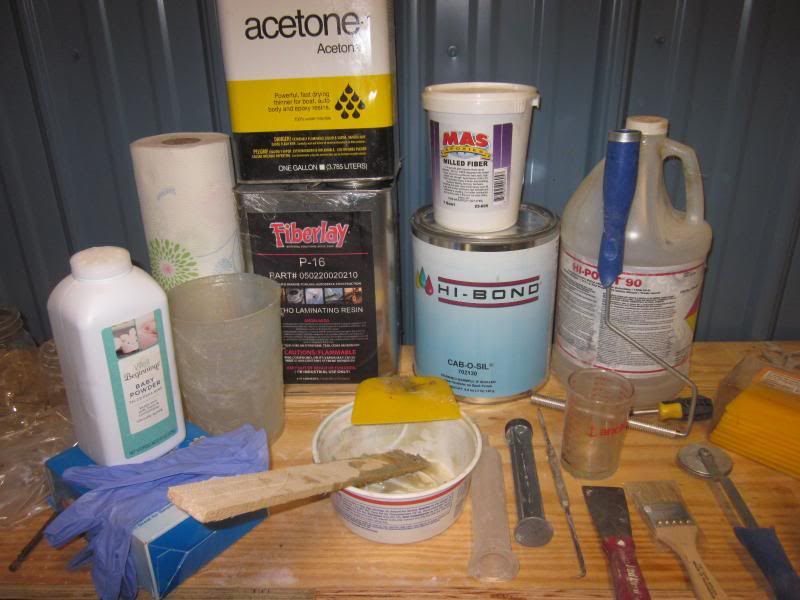
MHj...here are some of my chemicals. I'm a beginner, but a discriminating one ;) I did not include the better Hi-Bond milled fibers that are actually fibers, unlike the MAS "powder" pictured, and the wax additive for the final layers of laminating resin. Baby powder for your hands, then latex gloves. I would buy cabosil...two gallons for your boat. I'm ordering my 8th gallon of resin. Buy acetone locally, it'll be 4x cheaper. Any local paint store will have the cheap mixing cups with measuring marks. I use the metric sytem...1% of 350ml is a lot easier to figure out for someone like me!


Thank you jigngrub, I will order some tonight. I'm using poly resin for all major repairs but epoxy resin for holes and cracks. I've read books on fixing Gelcoat cracks and they are all a little gray in the area of heavy duty stress cracks. Any suggestions on this?


I have these handy dandy clamps we used to use to butt weld sheetmetal panels. They work great here...

I'm hoping that some thickened resin will keep these pieces exactly where I want them to start applying cloth next...

Party table plastic has been working really great for non stick applications...
 

maryhannaj

Chief Petty Officer
Joined
Sep 22, 2013
Messages
422
Re: 1968 Sportcraft C-Gull work boat project

Thanks for the pics of the chems and stuff jc. I realy like those clamps. Are they something that you made or can they be acquired? Are you seeing a problem with the reply box options? For some reason, most of time now when I want to post or reply, there is only a font option?
 

jc55

Senior Chief Petty Officer
Joined
Nov 3, 2006
Messages
665
Re: 1968 Sportcraft C-Gull work boat project

Harbor Freight MHj...gotta love it!


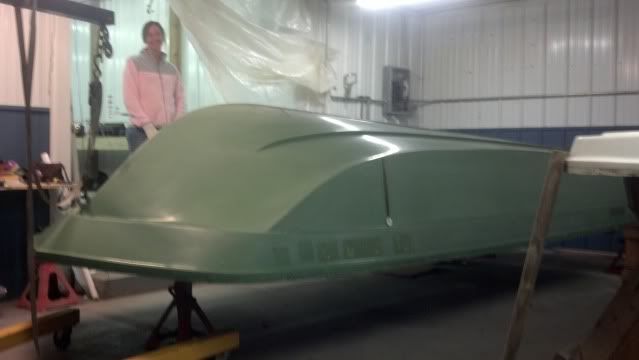
Well, I've been working 7 days a week lately and just got the phone call that I'm losing my shop, (got a renter). But my special helper(wife) helped me flip the hull today for a special marathon sanding session hopefully tomorrow. Got all my paint, bottom paint, body supplies, etc.

Going to wash her down (the boat, not the wife:) ) with lacquer thinner and pneumatic long board and D/A sand everything with 80 to 150 grit. Bought some epoxy and SM Fairing compound as jigngrub suggested for filling holes, trailer damage, keel wear, etc. Wash down with DX330, spray PPG DP50LF epoxy primer then shoot Nason with my lph400lv iwata(yes, the plan changed and I am mixing products) seafoam green and white, with Interlux VC17m bottom paint(from iboats).

Really nervous about painting. I haven't done it in forever but hoping for the best. I did some research on a Dupont topcoat over the PPG epoxy and am confident that I'll be okay using the proper induction time. I've shot Valspar, and John Deere flat black among others over DP before.
 

maryhannaj

Chief Petty Officer
Joined
Sep 22, 2013
Messages
422
Re: 1968 Sportcraft C-Gull work boat project

Holy crap man. How did just the two of you flip the hull? And thanks about the clamps. I think I will be goin out there just today to pick some up. I hope they have them in stock!
 

jc55

Senior Chief Petty Officer
Joined
Nov 3, 2006
Messages
665
Re: 1968 Sportcraft C-Gull work boat project

The trailer is a roller trailer. The tongue hinges too. :) With the trailer tongue stationary, we lifted the front of the tilting trailer upwards. The boat started rolling off of the trailer with the stern coming to rest on some cardboard we layed on the shop floor. We hooked an engine hoist to the bow eye via a ratchet strap. With the stern of the boat sitting on the shop floor, we raised the bow with the engine hoist and rolled the trailer outside.

With the bow still suspended from the engine hoist and only the stern of the boat sitting on the ground, we rolled the boat sideways, then upside down on cardboard(carpet would have been better without the sliding). My wife is little but can roll a 300lb noncompliant patient like a round bale down a hill...she's strong!
 

zool

Captain
Joined
Aug 19, 2012
Messages
3,432
Re: 1968 Sportcraft C-Gull work boat project

Harbor Freight MHj...gotta love it!


Well, I've been working 7 days a week lately and just got the phone call that I'm losing my shop, (got a renter). But my special helper(wife) helped me flip the hull today for a special marathon sanding session hopefully tomorrow. Got all my paint, bottom paint, body supplies, etc.

Going to wash her down (the boat, not the wife:) ) with lacquer thinner and pneumatic long board and D/A sand everything with 80 to 150 grit. Bought some epoxy and SM Fairing compound as jigngrub suggested for filling holes, trailer damage, keel wear, etc. Wash down with DX330, spray PPG DP50LF epoxy primer then shoot Nason with my lph400lv iwata(yes, the plan changed and I am mixing products) seafoam green and white, with Interlux VC17m bottom paint(from iboats).

Really nervous about painting. I haven't done it in forever but hoping for the best. I did some research on a Dupont topcoat over the PPG epoxy and am confident that I'll be okay using the proper induction time. I've shot Valspar, and John Deere flat black among others over DP before.

You should be fine using the dp primer in place of the Dupont ful-poxy ....they are both just epoxy primer...The Nason ful-thane will work fine in place of the dcc concept, and probably saved you a few bux :)...its thicker than the budget line Omni from ppg too.

Good luck with the shoot..
 

jc55

Senior Chief Petty Officer
Joined
Nov 3, 2006
Messages
665
Re: 1968 Sportcraft C-Gull work boat project

Thanks for all your help Zool...It's taken over a week to get just the primer(PPG). (Trying to support local business). I went to another auto body supplier and they spent an hour with me "taking me to school". They blew me away with their knowledge and their help...but, a Dupont dealer. Even the rep was there.
It was one of those experiences that you just don't have anymore in customer service. I really wanted the Concept, I just couldn't get it easily enough under the circumstances. It was pretty darn cheap. They even gave me a pint of Nason 2k "practice paint" for $10.
 

maryhannaj

Chief Petty Officer
Joined
Sep 22, 2013
Messages
422
Re: 1968 Sportcraft C-Gull work boat project

Well that explains it man. "Superwife"!:) You're good to go with anything then man. Good work gettin her flipped. I can't wait to see it pay off for ya man.
 

jc55

Senior Chief Petty Officer
Joined
Nov 3, 2006
Messages
665
Re: 1968 Sportcraft C-Gull work boat project

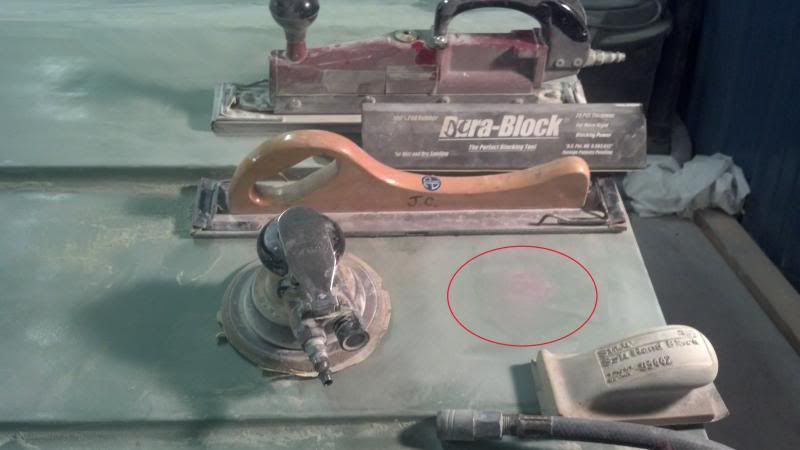
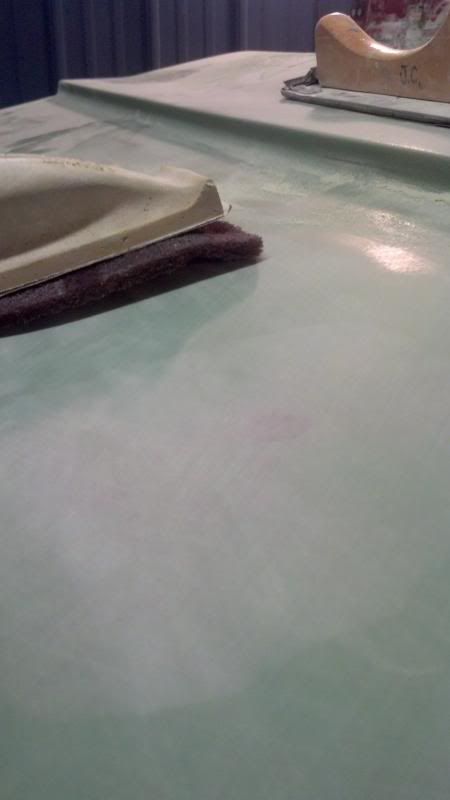
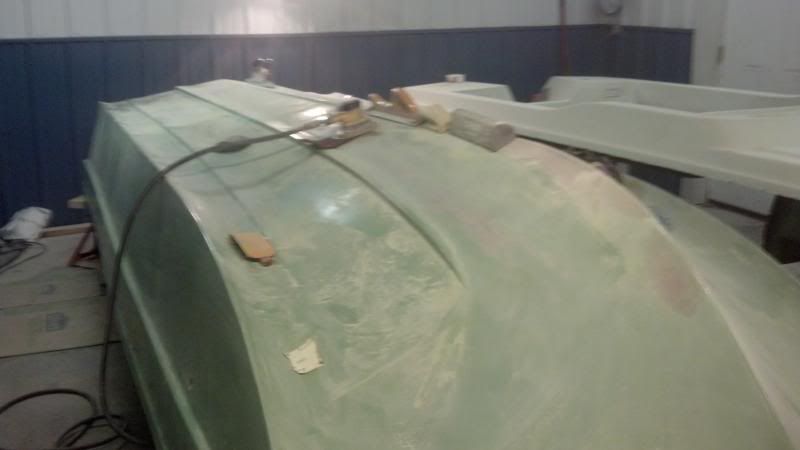
Well after a 24 hour cure, I started sanding the Fairing compound. Thick 150 epoxy, resin and SM fairing compound. I am REALLY impressed! This stuff is THE way to go(Thanks jigngrub). Washed and D/A'ed the Gelcoat, sanded with 80 grit, applied the epoxy then sanded with 80, 150, then a light pass with scotchbrite. It feathers SO well, and doesn't flake or chip like when you get resin on Gelcoat or like the cheap body fillers. I added some pics of tools too...


Another spot of repaired trailer damage...


An extra layer on the keel and filling some deep scratches...


I won't use "Bondo" on the hull since it absorbs moisture. This is a great alternative. 40 grit has been working good for "hogging" the splash pan repair. Have to use the dual action. Spinning a disc seems to heat it up and gum it up.

Tornado warnings tonight, had to stop early tonight :(
 

maryhannaj

Chief Petty Officer
Joined
Sep 22, 2013
Messages
422
Re: 1968 Sportcraft C-Gull work boat project

Nice man. It's smoothing right out. It's frustrating when those DA pads gumm up. You can spin a hard edge over them to break some of it up and get a bit more life out of one, but not much, and they aren't cheap. When that happens, I always fold them over onto themselves and save them for when I have to do some edge or circular sanding up to a molding or around a fixture of some sort so that it doesn't leave cut marks that show up like a black eye in a painted or cleared finish. Kind of another auto body method I picked up along the way.
Thanks for posting the pic of the foamy sanding block. I had forgotten all about them and their dang sweet for their purpose. They darn save that upper thumb knuckle some serious lock-up and you can really work them with your palm too when you need too.
Not that I really have to tell you this, but to you and all of your family, keep safe through the storm man!:)
 

jc55

Senior Chief Petty Officer
Joined
Nov 3, 2006
Messages
665
Re: 1968 Sportcraft C-Gull work boat project

Good advice MHj! I get the round Norton pads in tear off rolls and the rolls of Norton Sand paper in all grits. If it's cured, it usually doesn't gum up to bad. Those are good tips.

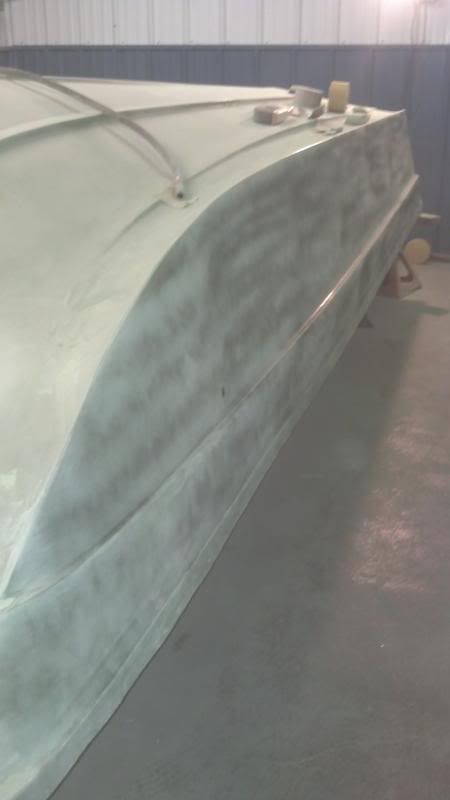
Been fairing all the dings and dents all over the hull and finding some voids under the gelcoat in areas. Epoxy takes so long to cure unless you crank the heat and leave it there overnight. Then you can sand the next day. Down to D/A sanding the hull sides(gelcoat) with 80 grit, small blocking it with 150, then a final guide coat and 220. Not going to make this perfect but so many variations in the factory gelcoat that flowing the imperfections will be better than distinct low spots...


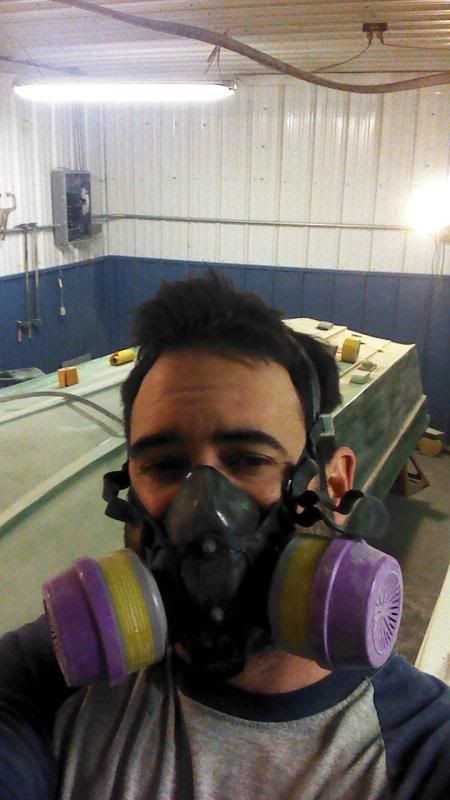
Oh, I took the liberty of posting a "selfie". All the cool kids are doing it!. If you notice carefully, there are no duck lips, toilets in the background, and I'm fully dressed...(those with teenagers will understand this)


Hope to epoxy prime and paint in a couple of days!
 

maryhannaj

Chief Petty Officer
Joined
Sep 22, 2013
Messages
422
Re: 1968 Sportcraft C-Gull work boat project

Movin right along there man. Good to see your wearing the mask my friend!
 

jigngrub

Fleet Admiral
Joined
Mar 19, 2011
Messages
8,155
Re: 1968 Sportcraft C-Gull work boat project

Fairing and filling work looks great jc!

What hardener did you choose to get with that 150 thick epoxy? The medium or fast?
 

jc55

Senior Chief Petty Officer
Joined
Nov 3, 2006
Messages
665
Re: 1968 Sportcraft C-Gull work boat project

Thanks guys, been using the medium hardener with the "thick 150" epoxy jigngrub. I use a whole lot less "SM fairing compound" with the epoxy being thick as it is and only mix around 9 ounces at a time. I keep this room at 70 degrees and I've introduced a retired pancake griddle and pot of water for heating up my epoxy and paints during their induction times.

RANT FOR BORED READERS ONLY: Been learning a lot here on this boat project but there seems to be an awful lot being left out on Gelcoat crazing repair.

1) If you block sand gelcoat far enough for a smooth surface in eliminating crazing, you are bound to sand through to the underlying fiberglass(atleast in spots). Particularly on the side of a hull. This underlying fiberglass contains small pin holes(air bubbles) from the lay up process on my cheap boat(which presents another problem). So, you are either using a fairing compound over properly prepared and sanded gelcoat crazing, or you are using it over the pinholes. Shooting epoxy primer over pinholes and crazing does not seem to fill them. (and I'm talking about the random 1/4" long almost microscopic cracks or checking that you absolutely cannot eliminate due to the sheer number of them)

2) Every craigslist search seems to contain MOSTLY, the $100-$1000 neglected run abouts, baking in the sun with shredded interiors, crazed gelcoat, in the backyard and uncovered. These are the boats that were never designed to last this long let alone be restored.

So, what are people doing really? I see that high end boats have their hulls stripped or completely re-faired by imported labor. Are these little trihulls and lower end run abouts all like this? I haven't seen one post about paint failures on the internet or follow up on best kept practices regarding hull rework. Like, "I used bondo and it all fell off". or, "My crazing repair failed and this is why".

I like to become proficient at everything I challenge myself with to prepare me for the next big project challenge (maybe a wooden Chris Craft ;) and this is kicking my butt!


So far I...
1) Washed the boat with scotch brite and lacquer thinner.
2) Scrubbed all crazing, cracks, dings, etc, clean with lacquer thinner
3) D/a sanded entire hull with 80 grit, scarfing deeper gouges and dings
4) Recleaned hull
5) Faired all dings, scrapes, snap holes, voids, etc with epoxy fairing compound(Several days)
6) Block sanded entire hull above water line areas with 80, 150, then 220 grit as deep as possible with a guide coat
7) two rag method cleaned with PPG dx330 wax and grease remover
8) wiped down with tack cloth
9) Epoxy primed hull

Now I'm left with the almost microscopic small, random, checking here and there in the hull's gelcoat that I didn't see before. Not enough to have redone an entire area, but just random....and too many to have ground them out. they're the size of human hairs!!!!

It DOES look like the epoxy primer infiltrated these. So, I'm using a 2 part USC spot glaze(poly based) over every little miniature check with a squeegee(which seems to fill it perfectly these are teeny tiny mind you), block sanding the epoxy primer at 48 hours, then reshooting another coat.

I'm hoping that the spot glaze will be encapsulated by the two coats of epoxy? What would the pros do on painting a $300 customer boat without a team of dedicated migrant workers and an unlimited budget? Am I over thinking this?

Sorry for the rant. Happy Thanksgiving ALL
 

Woodonglass

Supreme Mariner
Joined
Dec 29, 2009
Messages
25,929
Re: 1968 Sportcraft C-Gull work boat project

IMHO you are WAY WAY WAY overthinkin this!!! This is not going to be a "Show" Boat. Finish her up an Shoot it!!

Gobble Gobble!!!
 

jigngrub

Fleet Admiral
Joined
Mar 19, 2011
Messages
8,155
Re: 1968 Sportcraft C-Gull work boat project

2)

So far I...
1) Washed the boat with scotch brite and lacquer thinner.
2) Scrubbed all crazing, cracks, dings, etc, clean with lacquer thinner
3) D/a sanded entire hull with 80 grit, scarfing deeper gouges and dings
4) Recleaned hull
5) Faired all dings, scrapes, snap holes, voids, etc with epoxy fairing compound(Several days)
6) Block sanded entire hull above water line areas with 80, 150, then 220 grit as deep as possible with a guide coat
7) two rag method cleaned with PPG dx330 wax and grease remover
8) wiped down with tack cloth
9) Epoxy primed hull

Now I'm left with the almost microscopic small, random, checking here and there in the hull's gelcoat that I didn't see before. Not enough to have redone an entire area, but just random....and too many to have ground them out. they're the size of human hairs!!!!

It DOES look like the epoxy primer infiltrated these. So, I'm using a 2 part USC spot glaze(poly based) over every little miniature check with a squeegee(which seems to fill it perfectly these are teeny tiny mind you), block sanding the epoxy primer at 48 hours, then reshooting another coat.


Bah!... just beat it with a chain and shoot it, tell everyone it was like that when you bought it.:flypig:

Jus' kiddin' jc, I know what a PITA it is to be an OCD/perfectionist... but hey, the things we lay our hands on usually come out looking pretty good.

It sounds like you're on the right track, but I dunno about that poly spot glaze and the epoxy primer. I prolly would've just skimmed the whole thing with the fairing compound and sanded it... but I've been known to do stuff the hard way.

Even though you may not intend it, I think that boat is going to come out show room quality. It may be kickin' your butt now, but it'll be worth it when you look at the finished product. I just hope you don't have a thrombo with the first dock ding!:laugh:
 

jc55

Senior Chief Petty Officer
Joined
Nov 3, 2006
Messages
665
Re: 1968 Sportcraft C-Gull work boat project

LOL guys...OCD is right. Been working afternoons and going out to the shop in the mornings and back out after midnight.

Fairing the whole thing would've been a nightmare but probably the best solution. I saw a pro painter stop painting a '67 mustang with red metallic, fill a couple of pin holes that were missed, scotchbrite, then keep shooting...

Thanks for the encouragement guys. I don't care what happens to the boat when I'm done since I'm using it to tote my floating dock to an island. I just need to know that I can do this!!! :)
 
Top