1979 Sea Nymph FM 161 resto

Streetgang

Petty Officer 1st Class
Joined
Oct 13, 2012
Messages
251
Re: 1979 Sea Nymph FM 161 resto

Going forward.

General plan:

Going to change from remote steer / side consol to Teamster steer. Sure like the additional space and at my age have been tillering for quite some time now.

New ETEC rudes are sure nice and looks like they are the best of the bunch for under 2 mph trolling. Will see what local dealers will do on trade or upcoming boat show specials. Thinking 30 or 40 hp but elec. start / tilt options may keep it at 30.

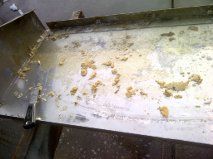
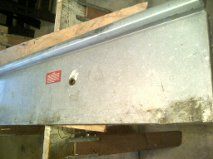
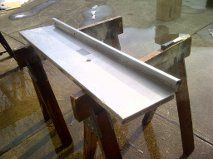
Not going to paint or polish the boat. We process aluminum at work almost daily and put it through an acid bath to provide a uniform ?satin finish?. Will test some internal pieces and check results.

Get checklist going on supplies to order.

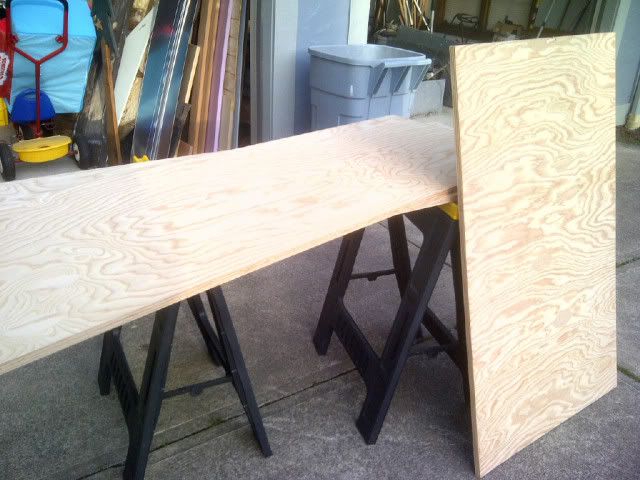
Still not sure on deck finish. It will be epoxied for sure on both sides and at this time thinking on additionally, a no-slip paint. From there considering removable matting so can easily clean up boat. Not sure if good idea to seal outside edges of deck to gunwales or not. If drainage system works then maybe no sealing and a good means to keep bilge clean and fresh, still thinking on this. Will do some more searching on posts and perhaps someone might add a comment or 2.

Be ready for breaks in weather to get boat home and priority of jobs to do.
 

Streetgang

Petty Officer 1st Class
Joined
Oct 13, 2012
Messages
251
Re: 1979 Sea Nymph FM 161 resto

Feedback and past threads show this hull design relies on the poured in foam for some degree of structure. Pour in is OK with me but sure didn’t alleviate the original mfr. from taking just a few more steps and providing some relief for drainage.

It is loud and clear that covering the boat and taking out the drain plug will keep a dry and clean hull but for me it is equally clear that no matter what water is going to get in there and once it does need to provide a means for it to easily get to the stern. At same time a means to provide air and circulation will be of importance.

So have been going through past threads on how others have gone about this and I have a plan. If anyone wants to wade in it would be appreciated.

Even though I will add an additional bulkhead or 2, still thinking I want poured in foam for structure to hull, bulkheads and deck.

I am going to take some 4” perforated, corrugated flexible drain pipe and cut it in half length wise. Then will lay it down from the gunwale to just short of keel, halfway in-between each rib. There will be a length of the pipe running from stem to stern following the keel. Oops and others have discussed setting up a French type drain system like this previously with dowels, pvc pipe, etc. At that point there will be relief for water to get from any point to the stern.

Now for the insidious foam that sticks to everything and flows everywhere. I have seen some posts where a plastic bag was inserted into the various sections and foam poured into them. Thinking it was Tracker boats but after some searching for a pic or 2 couldn’t find them. Additionally, this is a popular means (bag & expanding closed cell foam) for sealing up products inside of boxes for shipping. Finally, Oops proposed using boat shrink wrap as he pointed out any boat yard will have a bunch of it laying around, especially in spring when everyone is prepping for splash. Heck, the amount I have on the 30’ Chris is probably more than enough. And if that aint good bottom feeding on price then I don’t know what is, so once again a hearty thanks to Oops.

So will lay down the wrap in each compartment, over the pipe and up the bulkheads. Using Oops false deck idea ( a piece just covering the compartment) will pour foam and when set up remove false deck. Take the loose ends of wrap and fold over foam and seal up. There will be vertical structural rigidity from either side of the pipe as foam will be against hull and horizontal rigidity as foam will butt against bulkheads. I also think the pipe will be tough enough not to collapse. The addition of some extra bulkheads and changing decking from 1/2 to 5/8 should provide an improved system of structure and drainage, at least in my cabin fever brain.

My intent is not to open up the foam and floatation discussion it is just to take advantage of the posted information and make it work for this boat. Once again all the info. you need is here at Iboats.

Now all I need is an 80 degree day to pour foam.

There are enough other jobs to do in order to keep snow madness at bay.
 

jigngrub

Fleet Admiral
Joined
Mar 19, 2011
Messages
8,155
Re: 1979 Sea Nymph FM 161 resto

aFeedback for your consideration:

Placing a barrier between the hull and floatation breaks the holding bond of the foam to the hull, instead of the foam holding itself in the boat all of the upward force of the floatation will be transfered to the deck framing and decking fasteners... kind of like trying to lift your boat off of the trailer by the decking only.

Moisture will still collect between the foam and the barrier, it won't all drain out and never dry completely... kind of like a greenhouse.

Pigeon holing expanding foam through holes in the decking for the foam to support your decking will leave bowl shaped voids like the ones in this pic:
removefoam7_zpsc19cfbc0.jpg

They will collect water and never drain because they'll be completely surrounded by foam. You would have to turn you decking into swiss cheese or worse with holes to ensure no voids.

Since you won't be bonding your foam to the hull you may want to reconsider the sheet foam and additional deck framing for deck support.

You can cut and lay the sheet foam in the rib spaces that collect water to displace the water that collects in between them.

Adding additional deck framing will be easy with aluminum angle and rivets and using the minimal framing that's already there.

Install the rest of the sheet foam as you frame to minimize interference with framing and ease of foam installation.

I do have some design ideas for the expanding foam that will ensure drainage, be void free, and will support your decking if you'd like to hear them.
 

Streetgang

Petty Officer 1st Class
Joined
Oct 13, 2012
Messages
251
Re: 1979 Sea Nymph FM 161 resto

Firstly, thank you for the look-see and feedback. I realize you and others have spent some significant energy on floatation.

Placing a barrier between the hull and floatation breaks the holding bond of the foam to the hull, instead of the foam holding itself in the boat all of the upward force of the floatation will be transfered to the deck framing and decking fasteners... kind of like trying to lift your boat off of the trailer by the decking only.

Poured in sticks to hull so additional benefit of sucking the boat up in time of swamping. I understand but is it not the same for loose stuff also?


I have a problem putting into words exactly what am trying to accomplish. You are correct if I poured foam through holes in in a finished deck it would be swiss cheese in order to accomplish no voids. When I used term "false deck" the intent was to propose using Oops idea of using a piece of old decking with multiple holes or a slot covering only the one compartment to be foamed. When done with that one section and foam is set, removing the piece, finish wrapping / sealing top of foam with the shrink wrap. Move on to next section and repeat.

I will be adding additional framing and a bulkhead or 2 and probably upgrading to .125 5052 c channel for the weak fore to aft stringers.

I do have some design ideas for the expanding foam that will ensure drainage, be void free, and will support your decking if you'd like to hear them


Your thoughts are always appreciated. Thanks !
 

jigngrub

Fleet Admiral
Joined
Mar 19, 2011
Messages
8,155
Re: 1979 Sea Nymph FM 161 resto

Yeah, the loose sheet foam and pool noodles will try to float out of the boat and lift your decking too... that's the main thing I don't like about that design. You've got to have sturdy decking, framing, and your decking well secured to the framing for it to work.

The false decking for the expanding foam will work, but just do a section of the boat at a time... maybe 25%. After you remove the false deck you can fill any voids with more foam, let it expand above the flat areas of foam held down by the decking and after it sets you can come back with a carpenters hand saw and saw it off flush with the flat foam. Take the excess foam you cut off and lay it in the next 25% of the boat you're going to foam to reduce waste.

To ensure drainage without pipes or a hull barrier consider this:

Just like the false deck design for the foam, cut plywood strips about 12" wide to fit between your high ribs that support the framing. The plywood will lay on top of the smaller intermediate ribs. Drill pour holes in the plywood for foam pouring, weight down the plywood strips with concrete blocks and pour the foam. Remove blocks and plywood after foam sets, this will give you a nice level drainway of foam flush with the top of your smaller ribs that hold the water and water will no longer be able to accumulate behind them.

After you've finished the bottom of the drainway you'll need to create a trough down the center/keel of your boat, make it 6 or 8" wide. Stand up plywood on it's edge in between the tall ribs. One piece on each side of the trough 3 or 4" of the centerline of the keel for a 6 or 8" trough. This will look like an edge form for a concrete sidewalk. You'll need to secure the plywood to the tall ribs at each end and fill the inside of the trough with blocks to keep the foam from pushing/bowing the plywood in when you pour.

Pour your deck supporting foam, after it has cured remove the forms for the trough and you now have positive drainage down the center of your boat for water to flow out the bilge plug hole.

I suggest using a mold release agent on all plywood pieces you plan to pour foam against and then remove for clean and easy removal.
Mold Releases

Something else you may want to consider is painting or using an epoxy resin on the foam instead of a top wrap barrier, paint and epoxy both bond well to expanding urethane foam and will decrease the chance of moisture building between the foam and barrier.

If I haven't explained any of this well enough let me know and I'll try to explain it better.
 

jigngrub

Fleet Admiral
Joined
Mar 19, 2011
Messages
8,155
Re: 1979 Sea Nymph FM 161 resto

The floatation foam in my boat is setup in a similar manner as what I've described for your boat, it's 15 yrs. old and dry as a bone because all of the water drains out of my boat when I pull the plug after a washdown or getting caught in a rain.

DSC02208paint.jpg
 

Streetgang

Petty Officer 1st Class
Joined
Oct 13, 2012
Messages
251
Re: 1979 Sea Nymph FM 161 resto

Wow nice day, sun out so set up some horses and wanted to clean up some of the misc. aluminum pieces parts.

piecesshop2.jpg


Dont want to damage this sticker so will cover it up. Pretty good shape for a 1979 eh.

pieceswarrantywarning.jpg


Some of the pieces still had remnants of that sticky pour in foam and I remember what a pain it was scrapping off. I wet down a piece was working on with my solution, warm water, dish detergent and a little TSP and couldnt believe how easy it came off. Geez oh wilikers wish knew that when cleaning out bilge.

piecessmeg.jpg


My shop fabs and welds aluminum and then we acid etch it to produce what we call a satin finish. I am going to clean up these pieces parts and then take one to shop and see what it looks like after a bath. I wont have the final pic of after the bath for a few days but will post side by side when done.

Before wash:

pieces2b4cln.jpg


After wash:

pieces3aftclnstm.jpg


Next will be acid bath.


Heading out this weekend to pic up some lumber for transom and deck.

Its all good.
 

jigngrub

Fleet Admiral
Joined
Mar 19, 2011
Messages
8,155
Re: 1979 Sea Nymph FM 161 resto

Any progress is good progress!

Maybe we'll have an early spring and everyone with projects will get some nice warm weather to work on them.
 

Watermann

Starmada Splash of the Year 2014
Joined
Jan 12, 2013
Messages
13,822
Re: 1979 Sea Nymph FM 161 resto

Any progress is good progress!

Maybe we'll have an early spring and everyone with projects will get some nice warm weather to work on them.

Let's hope it was 9 here this morning with a north wind. I've been ordering and stock piling new parts for my 1978 SS 160 restore job. I'm very interested in this thread and what Streetgang ends up doing with his deck surface. I'm considering using restore liquid deck armor on mine.
 
Last edited:

Streetgang

Petty Officer 1st Class
Joined
Oct 13, 2012
Messages
251
Re: 1979 Sea Nymph FM 161 resto

H2O Man

Thank you for watching. So you've got my curiosity going...where might you be in the Great State of Washington and are you an inland lake guy or the actual big water ? 9 degrees, winds from the North, on the border I dont think the Canuckistanians are looking at you in a friendly frame of mind.

I was going to suggest looking in the the SN mfr. listing but see u r there. Very nice.

When you mentioned the liquid deck armor something rang a bell :confused: 
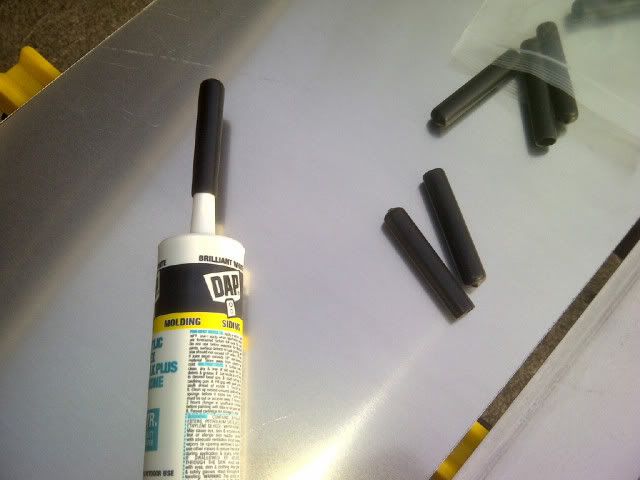
so rang it up and then I remembered looked at this product and video previously as an option for my deck (house) restore.

I have been trying to keep an open mind about its use but am wondering if it might be more work than just some epoxy and paint ? I assume you would put it on bottom as well as top of deck as we know the moisture is below deck as well.

My plans as of now are to epoxy some marine grade ply on both sides for deck and then paint with some grit on top. Then just put some removable pourous mats in. I figure can pull them out and clean easily but time will tell.

No doubt after reading all the threads keeping bow up and drain plug out is top priority along with a cover.

Welcome to the madness and consider posting some pics with your own thread soon. Thanks for the looksee.
 

Streetgang

Petty Officer 1st Class
Joined
Oct 13, 2012
Messages
251
Re: 1979 Sea Nymph FM 161 resto

Well just a bit of progress but having some fun and met some new folks.

Headed up to see my retired pal near Sandusky as there is a specialty hardwood lumber supplier with marine grade ply. Had to go south a bit along the Sandusky bay which is pretty large and it gets rural quickly. Farms, country roads, no one stirring, smaller country roads, older Starcraft on trailer for sale alongside road, (no camera) and then about time I think this doesnt make any sense the lumber yard appears. What a kick, no counter, walk around anywhere, check out all the wood. They import from all over the world and have anything that I could or could not think of. Serve yourself if interested, just adhere to a few rules: dont put lumber on concrete floors use the carts, dont stand lumber uprite as will nick up the ends, if you dont want it, put it back in same spot and finally if cant adhere to these rules add $50.00 to your order. All written on a piece of cardboard, in marker with those sentences that keep slowing curving downward.

Mike the only fellow there finishes with customer and asks if he can help. I tell him what looking for and he says has a piece right there that is damaged and will discount a bit. He shows me damage, very minor I say good to go and also ask if he would make 2 cuts in the 3/4 x 4' x 8' sheet which he has no problem with. Mike looks to be 65+/- slight of frame but hicked that sheet up like nothing and cuts it up for me on some wonderful older machines.

So I now have my transom pieces and bow top wood.

transwood.jpg
 

jbcurt00

Moderator
Staff member
Joined
Oct 25, 2011
Messages
25,152
Re: 1979 Sea Nymph FM 161 resto

Restore Liquid Deck Armor sounds like a roll down product similar to the bedliner materials that are often also discussed.

I don't think I'd want to use it on either side of the deck on my boat, but if anyone does, post up it's good VS. bad & anything of note over a long term use test. And pix pix pix....

Hey Cleveland: Where'd the good weather go & who ordered this carp you've been sending down my way? That guy needs a stern talking too....
bat.gif


Not enough of those kinds of places & those kinds of employees, support the ones ya can. Soon there's going to be fewer & fewer of them...
 

Streetgang

Petty Officer 1st Class
Joined
Oct 13, 2012
Messages
251
Re: 1979 Sea Nymph FM 161 resto

Hope ole Mike from lumber yard isnt watching this thread cause just broke the rull and set that one piece on end.......:facepalm:

It was just for the pic !
 

Streetgang

Petty Officer 1st Class
Joined
Oct 13, 2012
Messages
251
Re: 1979 Sea Nymph FM 161 resto

Went into shop / work today to check on pieces parts that were being acid etched. I know the fellow did a great job but the improvement wasnt all that dramatic. Our day in and day out is etching mill finish, alum. and that difference is significant.

No problem though, I am not going to paint them and was just curious with these samples if would take on the whole boat but not going to now.

I dont think the pics will do justice but here they are.

splashaft.jpg


panelaft.jpg
 

Streetgang

Petty Officer 1st Class
Joined
Oct 13, 2012
Messages
251
Re: 1979 Sea Nymph FM 161 resto

While at shop poked around a bit and picked up a few alum. scraps to play with.

shoppieces.jpg


I saw some vinyl sleeves we use to protect threads on t-bolts when finished strap goes to powder coat and thought they just might be perfect cover for a tube of caulk when opened and they were ! Beauty way to go.

capcaulk.jpg


Shop Super saw me nosing around and he always asks if can help me. He is just one great fellow and an accomplished fisherman/boater. I said nope, just trying to stay out of everyones way. He says finally got the trailer license plate bracket done that I requested. I had asked when he the correct dies in brake press and the time to bend up a simple carbon steel bracket but of course he hands me a nice stainless steel bracket which will probably outlive the trailer and me for that matter.

Similar to Iboats peoples, it is amazing what good joes are willing to share or to do for you!

So now I either burn up some drill bits or poke around shop to use ironworker and punch some holes in it. Good problems to have eh.

I wanted it offset.

licbkt.jpg
 

sprintst

Commander
Joined
Apr 18, 2009
Messages
2,066
Re: 1979 Sea Nymph FM 161 resto

My bad. We did send the cold weather down south mainly because we don't need too much of it and and to keep the bugs in check when we go visit. Not much can survive in the cold...but if it lives then it deserves to be there :)

Cool boat my friend. Take your time and have fun with it, so it doesn't feel like a second job, and enjoy your boat for the next however many decades. My boat is 36 this year and might outlast me :)
 

jbcurt00

Moderator
Staff member
Joined
Oct 25, 2011
Messages
25,152
Re: 1979 Sea Nymph FM 161 resto

When the time comes, it looks like you might be able to scrounge some flotation foam scraps at work, or get a wholesale price:
shoppieces.jpg


It looks like a sheet of rigid pink foam in that material racked just inside the doorway...
 

Streetgang

Petty Officer 1st Class
Joined
Oct 13, 2012
Messages
251
Re: 1979 Sea Nymph FM 161 resto

It looks like a sheet of rigid pink foam in that material racked just inside the doorway...[/QUOTE]

JB

Thanks for stopping by. As the ole saying goes, you can run but you cant hide. I always get a kick of the looksee we all get when looking inside someones shop. You do some nice stuff sir.
 

Watermann

Starmada Splash of the Year 2014
Joined
Jan 12, 2013
Messages
13,822
Re: 1979 Sea Nymph FM 161 resto

I grew up on the mighty Columbia River and now live a short distance from it. I also spend some time on numerous small lakes and on the way to the launches I do have to dodge BC plates with hosers trying to figure out KPH vs MPH.

I put deck armor on the floor of my dogs kennel for a test and he sure likes it. It does look nice and you can pick the color. I think I would seal the bottom of the ply since water will never stand on it and coat the top side.

I will get on that pic posting one of these days and keep up the good work, I'm enjoying your story line.
 

Streetgang

Petty Officer 1st Class
Joined
Oct 13, 2012
Messages
251
Re: 1979 Sea Nymph FM 161 resto

So I see sprintst :canada: stops by and makes a succinct statement about the bugs that can survive in the GWN, deserve to be part of it all, and my friend cant argue with that at all. I visit GWN half a dozen times a year for the last 40 or so and enjoy it no end. My partner lives in the most southern part of all the GWN, Pelee Island, year round population of about 150 on about a 15 mile long island. Beauty place.

Anyway, you reminded me of a trip home one time when got bit pretty bad by some no see ums, then too much Labatt but a good sleep where I picked the ear to death. Ride home was fun for boys behind us because all they could see through my rear window of the F 150 was this huge ear sticking out from my skull.

Thanks for the driveby and wishes. Same to you.
 
Top