1985 Mercury I6 impeller disintigrated

V20Pilot

Cadet
Joined
Jul 17, 2013
Messages
15
I recently purchased a 1980 Wellcraft V20 Steplift with a 1985 Mercury 115hp I6 OB. It was suggested in addition to changing the lower unit gear oil and plugs (if they looked bad, and they did), that I replace the impeller.

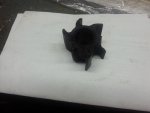
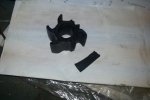
The impeller swap wasn't all that difficult other than a second trip to the shop to pick up the impeller kit rather than just the impeller as the old impeller and the housing was in bad shape. The impeller was missing one vane completely and a second vane was ripped in half. The mechanic asked if I was able to get the pices of rubber from the impeller out from inside the engine. He could tell by the look on my face I had not and when I asked how I checked he suggested I bring it into them to check.

Since I had already lost two weeks since I bought the boat having all the 30+ year old fuel lines replaced with new for fear of getting stranded out in the bay with ethanol damaged rubber hoses. I thought I would tackle this one myself.

I cannot seem to find a thermostat on this engine anywhere so I'm thiking there isn't one. It appears I may have to remove the engine from atop the drive unit to access the lower water jacket bolts. Is this correct? Or is there a way to sneak the lower cowl down/up or around to allow access to these bolts? Seems kind of silly but one never knows unless ya ask.

Thanks in advance for the help.

Steve
 

mr 88

Commander
Joined
Nov 3, 2010
Messages
2,261
Re: 1985 Mercury I6 impeller disintigrated

There is no thermostat. What I would do is see if water is coming out the tell tale and prop. A Infrared Temp gun from Harbor Frt or where ever can be had for 30-50 bucks and it is good to use to check the heat on trailer bearings etc. as well as your cylinder head which you should be able to feel at operating temp maybe 130-150 degrees depending on incoming water temp.The I would hook up a water pressure gauge,there is a bronze bolt plug near the middle spark plugs that you tap a low water press gauge to. They top out at 7-9 lbs. Those two steps would ease my mind. In most cases the rubber makes it way though the system as it disintergrates,and with what it is going to take to rip it apart I would take my chances after confirming above suggestions
 

jimmbo

Supreme Mariner
Joined
May 24, 2004
Messages
14,063
Re: 1985 Mercury I6 impeller disintigrated

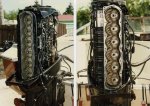
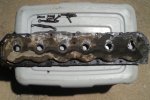
img016.jpgHere is what the water jacket around the cylinder looks like. Any parts would end up in here. The water enters at the bottom port side and exits at the top going to the port side into the exhaust maifold

1984 115. Identical to yours
 
Last edited:

V20Pilot

Cadet
Joined
Jul 17, 2013
Messages
15
Re: 1985 Mercury I6 impeller disintigrated

Wow, well that tells me a lot thanks. So I wasn?t trying to open the correct part anyway. I was trying to remove the exhaust manifold. The manual isn?t helpful in this area at all. Obviously from your picture the cover for the water jacket *can* be removed with the engine attached. :rolleyes:

You guys are great. :D I?ll try Senior Chief?s suggestion first & see how that goes. Then if it still isn?t pissing a good stream I?ll know where the water jacket is. :confused:

Oh, btw here is a shot of the old impeller.
20130721_201207.jpg

Steve (still learnin')
 

canoemang

Petty Officer 1st Class
Joined
Apr 9, 2011
Messages
350
Re: 1985 Mercury I6 impeller disintigrated

wonder how long the PO ran it with the impeller like that, its shredded..
 

V20Pilot

Cadet
Joined
Jul 17, 2013
Messages
15
Re: 1985 Mercury I6 impeller disintigrated

View attachment 204336Here is what the water jacket around the cylinder looks like. Any parts would end up in here. The water enters at the bottom port side and exits at the top going to the port side into the exhaust maifold

1984 115. Identical to yours

Hey Jimbo, did you have to remove anything from the front part of the engine IE: carbs or something to get the lower cowling that low? Mine has the bottom (#6) cylinder covered making it difficult to access the bolts.
I will post a picture tomorrow.
 
Last edited:

jimmbo

Supreme Mariner
Joined
May 24, 2004
Messages
14,063
Re: 1985 Mercury I6 impeller disintigrated

just the front and rear cowl supports, oh yeah, also the lower cover. 4 screws hold it
 

V20Pilot

Cadet
Joined
Jul 17, 2013
Messages
15
Re: 1985 Mercury I6 impeller disintigrated

just the front and rear cowl supports, oh yeah, also the lower cover. 4 screws hold it

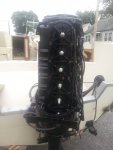
Yep got all that off/disconnected. Here is a shot from the rear same angle from what I can tell as what you shot yours at. 20130724_102108.jpg
And yes I have the four sheel metal screws and lower cowl removed. And not doing too well with getting the 1/4-20 bolts out without shearing off the heads. Five busted loose ok and four sheared off. I'm gonna soak the rest real good with P oil to hopefully loosten them up to prevent any more shearing of bolt heads.
If they don't loosen up and shear off I'm thinking just drill and tap rather than try an EZ out. But how to get a drill down at the lower ones with the cowl covering it? I'm just hoping they bust free. :facepalm:
 
Last edited:

emckelvy

Commander
Joined
Jan 16, 2004
Messages
2,506
Re: 1985 Mercury I6 impeller disintigrated

You need to use some heat or you'll never get those out. If you break the ones below the cowling line, you'll have to remove the powerhead to be able to drill them out. A hand-held propane or Mapp torch will help loosen them up. Be sure to have a fire extinguisher handy!

Note that on the busted ones you can get at, the best fix is to completely drill them out and install 1/4-20 Heli-Coils. The 1/4" kit isn't too expensive and the repair is far stronger than the original.

To keep the bolts from seizing in the future, spread a thin coating of Permatex No. 3 Aviation-type gasket dressing on the threads prior to installation. Torque the bolts to 70 inch-lbs (if I recall). Be sure to replace any busted bolts with stainless.

BTW trying to tap out stainless bolts is a Bugger, usually whatever stainless is left in the threads will bind-up the tap, and likely tear out the aluminum threads in the block. If you're lucky, the tap won't jam and break off! I've found it's much quicker and easier to drill 'em all the way out, and do the Heli-Coil repair.

One last thought, for any bolts that absolutely won't come out, it's better to drill the head off the bolt; that way when the cover is finally removed, you'll have a stub of a bolt to grab hold of with Vise Grips. A little heat and she should pop right out.

HTH & G'luck...........ed
 

V20Pilot

Cadet
Joined
Jul 17, 2013
Messages
15
Re: 1985 Mercury I6 impeller disintigrated

Hey thanks . I was wondering about heat but was concerned about trying it. Gotcha on the fire ext! I was going to use anti-seize on the bolts but if you guys say the Permatex is the way to go so be it. As for the reassembly I was going to use all new bolts and washers. Why try to save a few bucks on hardware with everything else I'm doing. I definately like the heli-coil idea better. I forgot about that wonderful invention. Last time I had to use one of those was on a spark plug in my old 67 Corvair or was in one of my VWs? So long ago I can't recall.

Thanks for everything guys. I'll keep ya'll posted. Oh, on forum ettique. Should I start a new thread as I progress with this , or just continue on with this one? Don't want to make any waves being new and all.

I know that was bad but I couldn't help myself. :laugh:

Steve
 

V20Pilot

Cadet
Joined
Jul 17, 2013
Messages
15
Re: 1985 Mercury I6 impeller disintigrated

You need to use some heat or you'll never get those out. If you break the ones below the cowling line, you'll have to remove the powerhead to be able to drill them out. A hand-held propane or Mapp torch will help loosen them up. Be sure to have a fire extinguisher handy!

To keep the bolts from seizing in the future, spread a thin coating of Permatex No. 3 Aviation-type gasket dressing on the threads prior to installation. Torque the bolts to 70 inch-lbs (if I recall). Be sure to replace any busted bolts with stainless.

One last thought, for any bolts that absolutely won't come out, it's better to drill the head off the bolt; that way when the cover is finally removed, you'll have a stub of a bolt to grab hold of with Vise Grips. A little heat and she should pop right out.

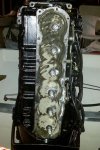
Well I never needed the FI! I was able to get the five bolts below the cowl out using my plumber's propane torch. I bought one of those pencil tourches at HD and it didn't do squat, I'll be taking that back tonight. It just had me shear off another head.

So I have the cover off and at first I saw nothing. But it was getting dark by then. Geez I wish I would have rented a storage unit for all of my wife's furniture/box collection so I could have my garage back. Grrr. So just as I'm ready to call it a night I peek in the small opening down below the cowl line, reached in with a small hex wrench and there it was, one of the missing vanes from the impeller. I'm guessing when I get home today I'll find the other one too hopefully without having to remove the lower unit again. All of the with the head broke off have a good bit of the bolt sticking out so I'm hoping I can coax the threaded portion out with some heat and Vise-Grips.

BTW, none of the bolts are SS. A few near the top had washers but most did not. Is there a place on line or does someone sell a DVD with PDF files with a blown-up diagram showing every nut, bolt, washer, strap (I need a new ground strap) and any other part of our motors? The Clymer's manual the PO gave me with the boat is not that good at all. Is the SELOC one advertized here on the site any better?

I'll create a new thread as I want to post some questions about cleaning all the crap out of the inside of the water jacket, painting and reassembly.

Steve

20130725_205037a.jpg20130725_204954a.jpg20130725_211647a.jpg
 
Last edited:

emckelvy

Commander
Joined
Jan 16, 2004
Messages
2,506
Re: 1985 Mercury I6 impeller disintigrated

Posted a reply on your new thread. Here's about as detailed a parts diagram as you're gonna get from Mercury:

Mercury Marine 115 HP (6 CYL.) END CAP, MANIFOLD AND EXHAUST COVERS Parts

Since your bolts weren't stainless, you might try drilling/tapping. Use great care to center the drill on the broken bolt, if necessary start with a small pilot drill. Use titanium bits or better so the drill will cut straight & true.

Nothing wrong with anti-seize compound, as long as it's the type that uses Nickel as a base. Try to avoid copper-containing compounds, as the copper forms a galvanic cell with the aluminum block, and causes corrosion.

Just about anything you slather on the fastener is better than assembling it dry. I've used waterproof boat bearing grease on bolts in the past, and it worked as well as the Permatex. But I prefer to use No. 3 on the powerhead exhaust manifold and block cover bolts that "see" the "sea", and grease on everything else, like lower unit mounting bolts, water pump, etc. The grease seals as well and is less messy/sticky than No. 3 when you take it apart next time.

Too bad the factory can't take the extra few seconds and miniscule cost per motor to use coated fasteners. Sure would be nice to be able to take 'em apart easily!!

BTW there's no way to know if a P.O. had used extra washers, etc when working on the motor. Most of 'em I've seen don't have a lot of flat washers back there. Usually there's a flat washer used with the ground strap. It certainly wouldnt hurt to use a small stainless flat washer with every bolt.

Have Fun...........ed
 
Top