'89 Bayliner Avanti restoration - where to start?

jbcurt00

Moderator
Staff member
Joined
Oct 25, 2011
Messages
25,154
Re: '89 Bayliner Avanti restoration - where to start?

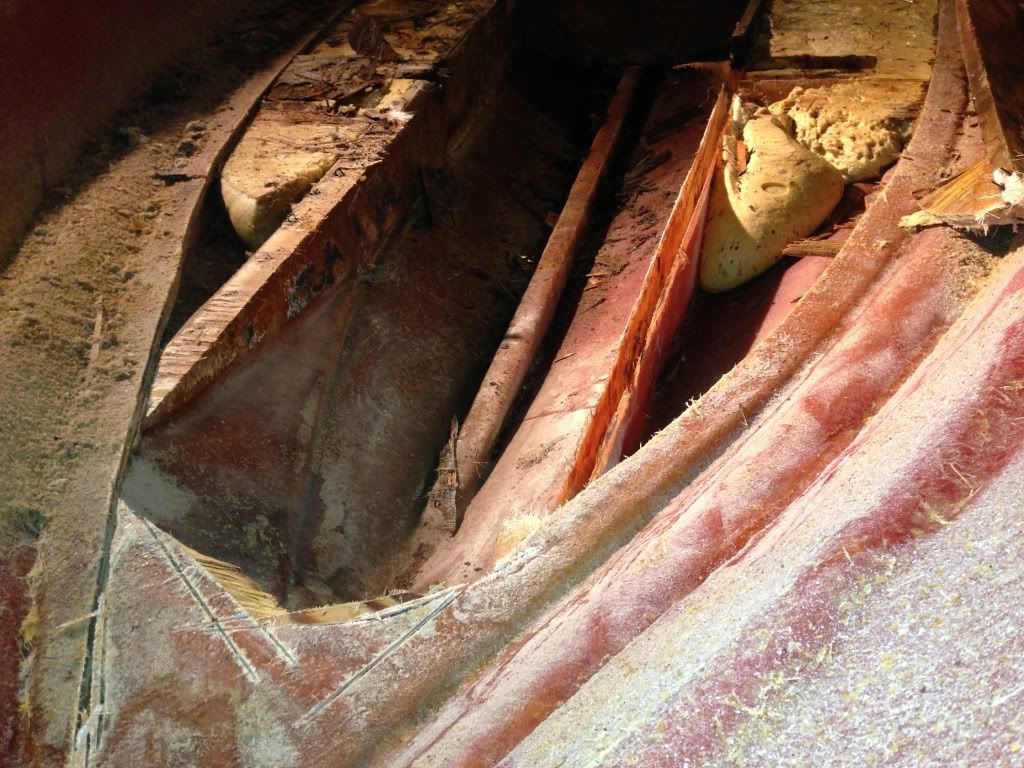
What I found on the first few cuts. I wasn't prepared to see a bunch of foam. Is that normal? Should I leave it? .
Foam is normal.
Get a piece of 1 1/2" pvc & chamfer 1 end so you can use it to core drill the foam. As rotten as some of the wood below deck's is, I'd be surprised if the foam was all 100% bone dry.

You can't really remove & replace the stringers w/ the foam against it anyway, so you'll need to remove 6" +/- along the outside of the stringer, and along in front of the transom if it has to be replaced.

Core sample the foam & then you can assess what needs to be done...... Generally, when the foam sample is removed, foam that appeared dry at the surface, leaks water that begins to fill the new 1 1/2" void from the coring.:facepalm:


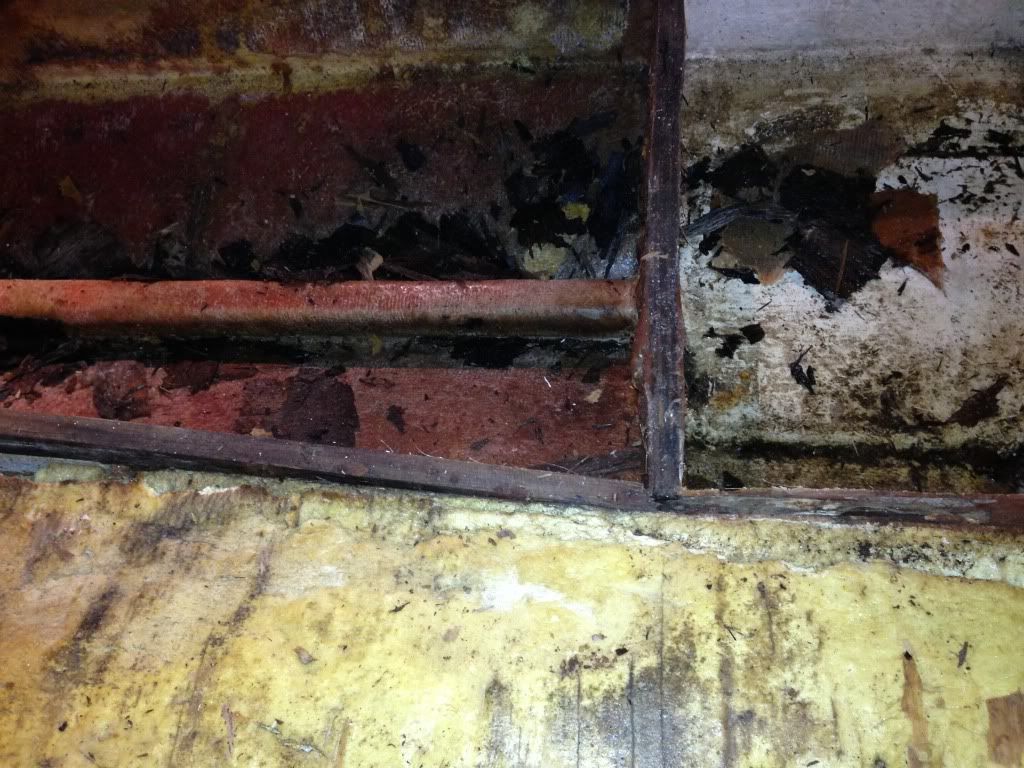
Tossed a picture of the bulkhead between the cooler and locker. I assume this guy is coming out or can I leave it?

Take it out, if you can, be careful, you might be able to use it as a pattern for the replacement
 

89avanti

Petty Officer 2nd Class
Joined
Nov 25, 2012
Messages
137
Re: '89 Bayliner Avanti restoration - where to start?

Thanks JB. What blade did you use on your multi-tool mostly?

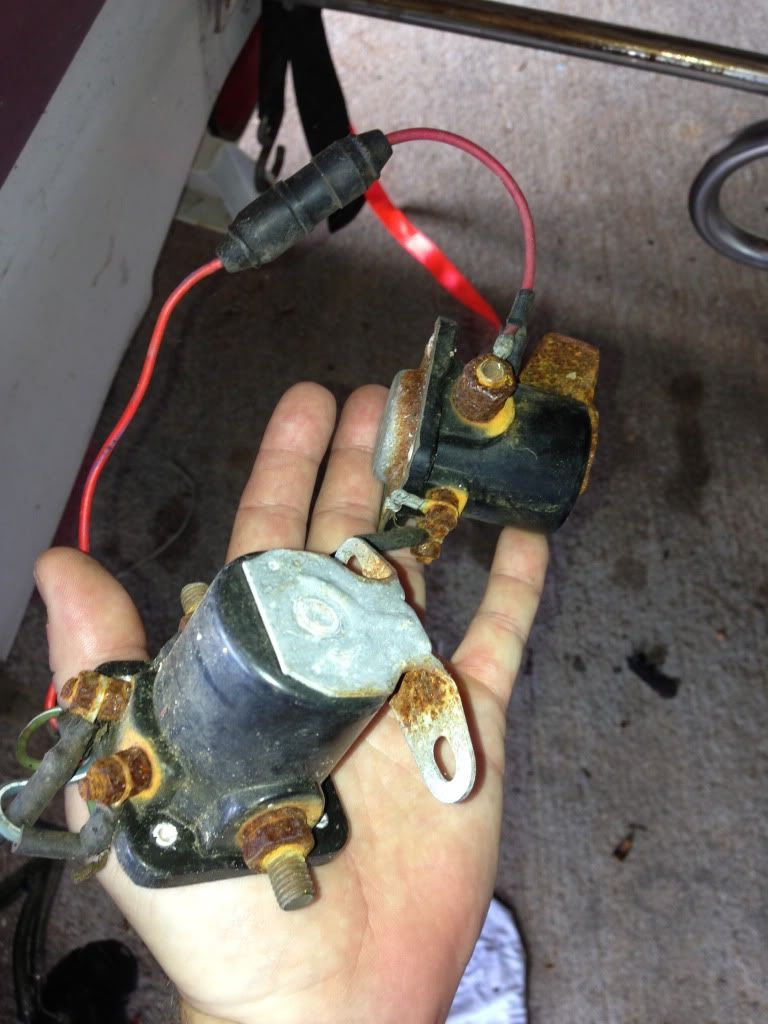
I was looking over the trim pump and it looks like the solenoids could use replacing. I took a picture and was wondering if this is something an automotive store may carry? I could not find any identifying marks on them for a part number.


jbcurt00

Moderator
Staff member
Joined
Oct 25, 2011
Messages
25,154
Re: '89 Bayliner Avanti restoration - where to start?

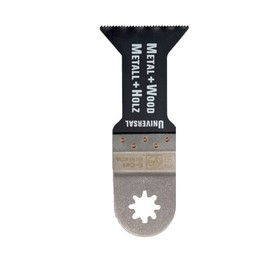
Inside corners & tight areas:
4014586291932lg.jpg


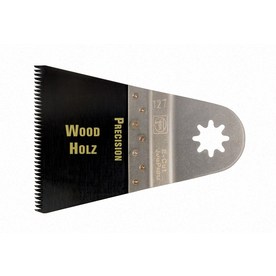
Most general cutting, and jabbing & cutting up into the cap/transom joint:
885911242127lg.jpg


Long cuts, like along the edge of the deck:
4014586268088lg.jpg


Often I just used what was in the tool & after using it in a corner, I just kept on using it.... Probably greatly shortened the useful life of the 1st 2 ^^^ blades.

I did not use these brands, just the 1st accurate image I found.

If you get a service manual for your motor, or look up the solenoid online, you might find a # that could be referenced @ NAPA or elsewhere. I mention NAPA because many carry (most can order) a good # of Johnson OB parts.

I/O trim solenoids ???? No idea.. Evil-bay & online suppliers have lots of solenoids available. Ordered 1 recently for a 1971 Merc 650. @$25+ship
 

89avanti

Petty Officer 2nd Class
Joined
Nov 25, 2012
Messages
137
Re: '89 Bayliner Avanti restoration - where to start?

Evil-bay & online suppliers have lots of solenoids available. Ordered 1 recently for a 1971 Merc 650. @$25+ship

HAHAH. Evil-bay. I'll check the SELOC I bought for this engine. I didn't even think about checking that.
 

89avanti

Petty Officer 2nd Class
Joined
Nov 25, 2012
Messages
137
Re: '89 Bayliner Avanti restoration - where to start?

HAHAH. Evil-bay. I'll check the SELOC I bought for this engine. I didn't even think about checking that.

OK well the SELOC doesn't have any model numbers pertaining to the solenoid for the trim or the starter for that matter. Stuck.
 

jbcurt00

Moderator
Staff member
Joined
Oct 25, 2011
Messages
25,154
Re: '89 Bayliner Avanti restoration - where to start?

What motor?

Might try here:
EBSCOhost - world's foremost premium research database service

Username: marshall
Password: public

after logon:

Select small engine repair

Select Marine/Boat motor

Scroll down & select manufacturer


Specific for your year & motor would be better, but in a pinch the combined is better then nothing. The Seloc manuals aren't ideal. Look for a Factory service manual, well worth the price.....
 

89avanti

Petty Officer 2nd Class
Joined
Nov 25, 2012
Messages
137
Re: '89 Bayliner Avanti restoration - where to start?

That's an awesome resource JB! My model is the Mercruiser Alpha One but the site only has Outdrive overhaul & outdrive service. Couldn't find anything regarding solenoids among the text.

I may have to go directly to the manufacturer with my serial number.
 

89avanti

Petty Officer 2nd Class
Joined
Nov 25, 2012
Messages
137
Re: '89 Bayliner Avanti restoration - where to start?

Looks like this site has a good selection of solenoids. I found this. Right track? Mariner Power Trim Solenoids - iboats


That's an awesome resource JB! My model is the Mercruiser Alpha One but the site only has Outdrive overhaul & outdrive service. Couldn't find anything regarding solenoids among the text.

I may have to go directly to the manufacturer with my serial number.
 

89avanti

Petty Officer 2nd Class
Joined
Nov 25, 2012
Messages
137
Re: '89 Bayliner Avanti restoration - where to start?

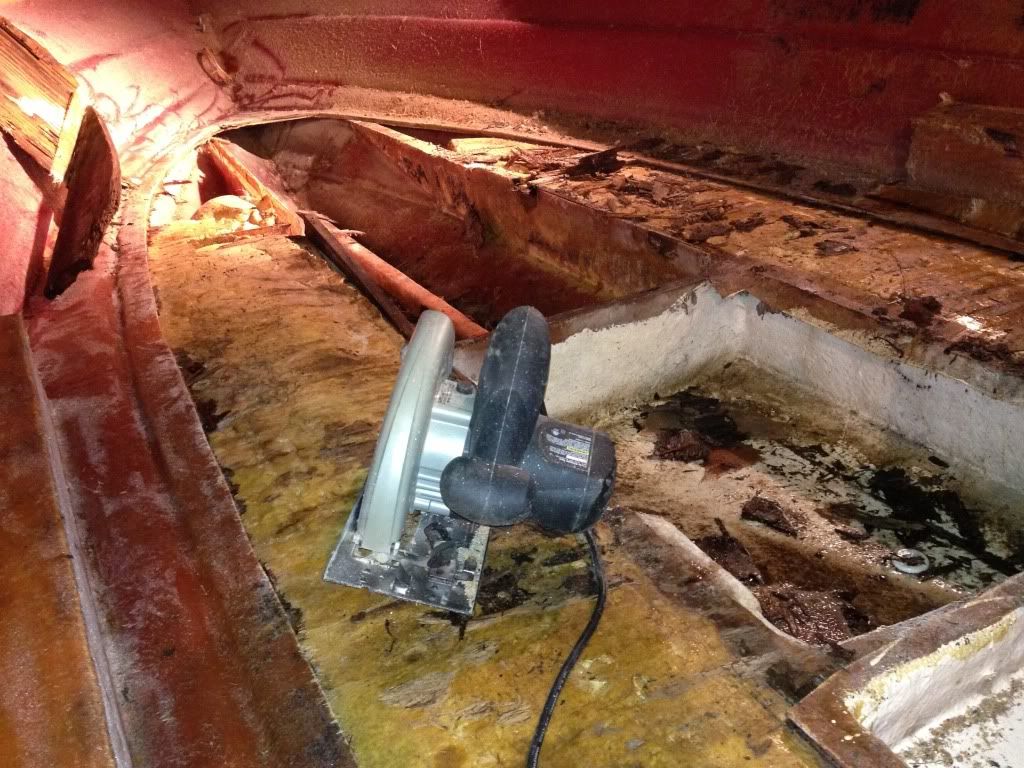
Just got done cutting the deck around the tabbing. Left a couple of inches as you guys suggested. Of course, around the rear where the engine sits and the extreme front point I couldn't get my saw in to cut like I wanted to oscillating tool ... you're next!

A few questions now.

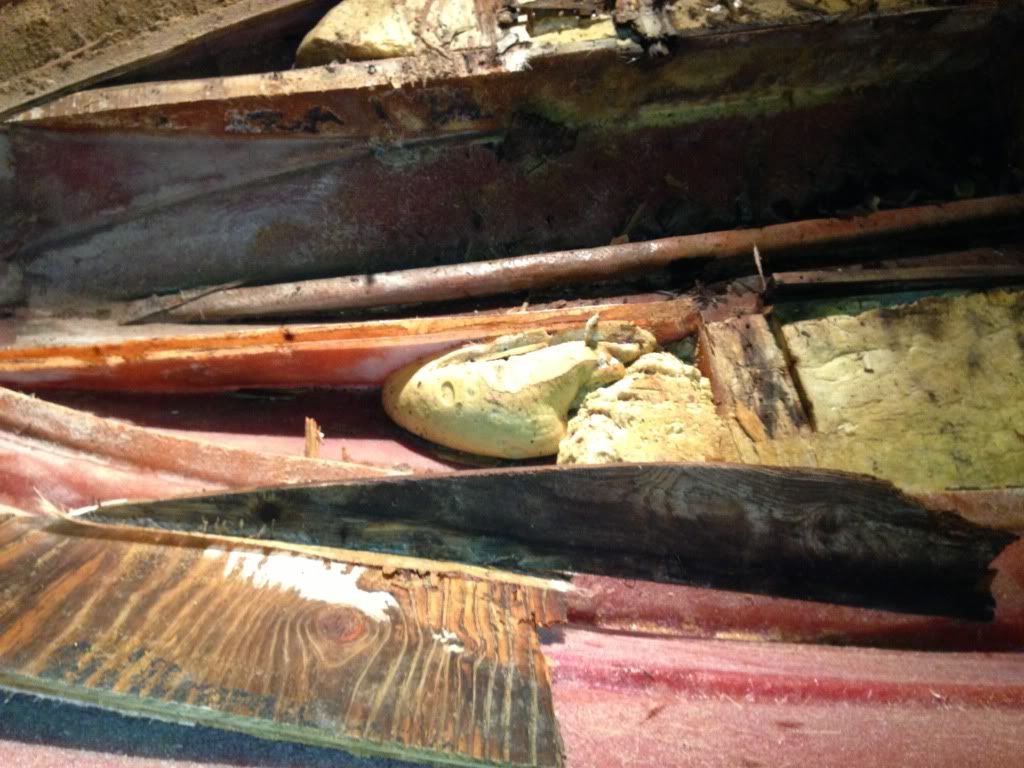
1. I see there were two pieces of wood, shaped like the bottom of the boat, extending from the front to the back on both sides of the stringer. These were rotted through. I may be able to coax it all out and get a rough measurement for making the new pieces. Maybe. They slide down inside some glass that's built just for these pieces, sitting flush with the deck. No doubt for reinforcing the deck. The pieces look to be 1" ply. I assume I use the same material as I use for the ply on the deck to recreate these pieces? In this same picture just above the chunk o wood that's curved is a very distinct indentation where a 1x4 used to be. One on each side. I can't tell what this was for and if it was the PO attempt at stabilizing the deck or if it's stock and needs to go back ... as well as if it spanned the entire gap as one piece originally.


2. There is foam, as JB described, running nearly to the tip of the bow. I took a picture but will I need to fill those gaps in? If the foam isn't rotten that is. If it is I assume it all comes out and I refoam it? Materials, methods? Same picture on the left side there were very thin pieces of glass about 4-5" wide which rode over the long pieces of wood running from bow to stern. They were stapled into the wood.


3. Around the rear next to the place where the engine is mounted how close do I cut the deck out? I just went 2" on that side and all around the engine compartment like I did the tabbing. All that wood was rotten as well ... tho not nearly as bad as the middle where the ski locker and cooler are. Man that stuff was like wet cardboard.


4. Does this look right? I'm so far into "I have no idea" territory that I'm questioning myself being able to do all of this. I know it's a long series of small jobs but I looked at the boat before I started all of this and now and it's destroyed!!! LOL. De-stroyed.


Thanks guys. Tomorrow is multi-tool day. Cutting out the rest of this deck.
 

Scott Danforth

Grumpy Vintage Moderator still playing with boats
Staff member
Joined
Jul 23, 2011
Messages
50,530
Re: '89 Bayliner Avanti restoration - where to start?

your at the "oh crap, what did I get into stage" this is most critical. keep going to get thru it. this is where many people stop their project and it sits.

take many many measurements, especially of the bulkheads and sringers that you may be replacing as well. cardboard templates can be your friend.

when you put new stringers and bulkheads, use a router to round-over the top edges. CSM doesnt do corners.

if after the foam core test you need to remove the foam, many will tell you they used steak knives, etc. forget all that. pick up a 2" cup brush, a drill extension bit and a cordless drill. the cup brush turns the foam into foam dust, then simply vacuum up with the shop vac.
 

89avanti

Petty Officer 2nd Class
Joined
Nov 25, 2012
Messages
137
Re: '89 Bayliner Avanti restoration - where to start?

your at the "oh crap, what did I get into stage" this is most critical. keep going to get thru it. this is where many people stop their project and it sits.

take many many measurements, especially of the bulkheads and sringers that you may be replacing as well. cardboard templates can be your friend.

when you put new stringers and bulkheads, use a router to round-over the top edges. CSM doesnt do corners.

if after the foam core test you need to remove the foam, many will tell you they used steak knives, etc. forget all that. pick up a 2" cup brush, a drill extension bit and a cordless drill. the cup brush turns the foam into foam dust, then simply vacuum up with the shop vac.

Funny you should say that Scott. After I climbed out of my body suit, safety glasses, respirator & headlamp ... I looked back at this mess and said "what in the F did I get myself into" HAHAhah... /sigh.

I'm definitely going to have to replace the two very long pieces of wood running the length of the boat on both sides of the stringer. It's just mush. I'm definitely going to have to replace the bulkhead wood, it's not mush but I expect it is down at the bottom.

Essential question moving forward at this point is how far back do I cut around the engine compartment? I can cut the rest of the deck out with zero problem because the tabbing is a visual identifier for where to stop cutting but in the back around the engine I have no idea how far to cut or when to stop.

Thanks. I'm hoping for no bad foam. What's the indication? Just black or dark foam in the core sample?
 

Scott Danforth

Grumpy Vintage Moderator still playing with boats
Staff member
Joined
Jul 23, 2011
Messages
50,530
Re: '89 Bayliner Avanti restoration - where to start?

water oozing out of foam is bad

I would replace everything while your in there, the "engine compartment" as you call it is the bilge. chances are the stringers (what you refer to as "two very long pieces of wood") are rotten in the bilge area all the way back to the transom. The transom is probably wet as well along with the two engine mounting blocks. your in it this far, and from the looks, about 1/2 way thru the demolition. next comes cleanup followed by build-up.

A few things I would have done differently now when I did my Avanti, in stead of the mouseholes I left between the ski locker, cooler, and bilge, I would have run PVC pipe so I could control the water a bit better. I would have also most likely gel coated the bilge, locker and cooler. I had used epoxy paint which worked great as long as I had the boat. I switched to gel for my later projects.

The transom in my boat was 1.5" thick wood only in the center, and 3/4" the rest of the way. I did mine in seacast (www.transomrepair.net - The Home of Seacast? - www.transomrepair.net - The Home of Seacast?) and in hind site would have been much much cheaper going with wood vs screwing around making forms, etc. The original wood has lasted over 25 years in your boat, the next round will last just as long.
 

89avanti

Petty Officer 2nd Class
Joined
Nov 25, 2012
Messages
137
Re: '89 Bayliner Avanti restoration - where to start?

water oozing out of foam is bad

I would replace everything while your in there, the "engine compartment" as you call it is the bilge. chances are the stringers (what you refer to as "two very long pieces of wood") are rotten in the bilge area all the way back to the transom. The transom is probably wet as well along with the two engine mounting blocks. your in it this far, and from the looks, about 1/2 way thru the demolition. next comes cleanup followed by build-up.

A few things I would have done differently now when I did my Avanti, in stead of the mouseholes I left between the ski locker, cooler, and bilge, I would have run PVC pipe so I could control the water a bit better. I would have also most likely gel coated the bilge, locker and cooler. I had used epoxy paint which worked great as long as I had the boat. I switched to gel for my later projects.

The transom in my boat was 1.5" thick wood only in the center, and 3/4" the rest of the way. I did mine in seacast (www.transomrepair.net - The Home of Seacast™ - [url]www.transomrepair.net - The Home of Seacast™[/url]) and in hind site would have been much much cheaper going with wood vs screwing around making forms, etc. The original wood has lasted over 25 years in your boat, the next round will last just as long.

I want to ask you about the transom repair first. After reading the Seacast web site they make it seem like it's the logical choice for any transom repair. All this they claim to be and more ::

Seacast™ is almost 3 times the strength of a marine plywood transom.

Seacast™ is Green! it has 35% recycled FRP which gives it it's secret strength.

Seacast™ does not rot because it is waterproof.

Seacast™ is lighter than a marine plywood transom, so it floats!

Seacast™ does not freeze or creep at any temperature.

Seacast™ is unmatched in impact resistance.

I assume it was just a pain in the rear and that's what is driving you towards the ply if there was a second run? I'm at the mercy of this forum ... pretty much. Every step I've made thus far has been a combination of common sense and the fine people guiding my oscillating tool from afar.

I'm looking at the stringers and two of them are coming out tonight. The center one looks to be in a great condition. As you're facing the back of the boat the right side of the transom is questionable. The left side and middle are solid as a rock. Mine are just as you said yours were Scott, 1.5" thick in the middle and 3/4" on the sides. I'm going to vacuum this thing out and get it cleaner and start again with the multitool.

Was my assumption right when I said I'd need to cut all the way to the edge of the bilge area? No tabbing to guid me on this. Its just a rounded edge that goes from the deck to the bilge. I have a router too so I'll be rounding those edges as suggested when it comes time.

Thanks again guys.
 

jbcurt00

Moderator
Staff member
Joined
Oct 25, 2011
Messages
25,154
Re: '89 Bayliner Avanti restoration - where to start?

Sam also used a seacast type product for his MFG resto:
MFG rebuild getting started pics


He's online now, PM him & ask pretty much anything you'd like quick answers about the seacast transom. He'd probably go over the costs too, if his Admiral isn't in the room :faint2:
 

89avanti

Petty Officer 2nd Class
Joined
Nov 25, 2012
Messages
137
Re: '89 Bayliner Avanti restoration - where to start?

Thanks JB. I messaged Sam.

I used the oscillating tool to do some detail before I hit the bed. I'm not seeing the lip that I'm supposed to be laying the new ply down upon. Unless that slight curve in the hull is the lip?? It looks like the previous ply may have been tapered to fit on it perfectly. I won't have to taper the new ply to accommodate this correct? This is pretty clean all the way against the hull. No cutting through it because I'm being meticulous. Tell me what you think? Am I doing it right?
 

GT1000000

Rear Admiral
Joined
Jul 13, 2011
Messages
4,916
Re: '89 Bayliner Avanti restoration - where to start?

You are doing an excellent job cutting away the old deck...
And you are correct, there is no actual "lip" for the deck to sit on...you don't have to fit the new deck as well as the original, but the better job you of fitting it, the less filler material you will need to use to fill any gaps, which saves money...
 

89avanti

Petty Officer 2nd Class
Joined
Nov 25, 2012
Messages
137
Re: '89 Bayliner Avanti restoration - where to start?

You are doing an excellent job cutting away the old deck...
And you are correct, there is no actual "lip" for the deck to sit on...you don't have to fit the new deck as well as the original, but the better job you of fitting it, the less filler material you will need to use to fill any gaps, which saves money...

Thanks GT. It feels more right when you have people of experience encouraging what you're doing as the right way to do it. I'm a meticulous person and try to do whatever I'm doing to the best of my ability by going slow and using the correct tools. More cutting in a few... going to see if I can get one full side done on my lunch.
 

Scott Danforth

Grumpy Vintage Moderator still playing with boats
Staff member
Joined
Jul 23, 2011
Messages
50,530
Re: '89 Bayliner Avanti restoration - where to start?

Seacast is 1 gallon of bondo, 1 gallon of resin, a bunch of ground up boat hull pieces. Then add 2 tubes of creme hardener and pour in. As for being green, restoring and not putting in a landfill is being green. Seacast worked OK, however not at 3 times the cost . the labor is actually comparable

Yes, that little curve is the lip. You are doing great. I used 24 grit discs to remove old wood and 'glass.

I also used diamond cut-off blades in the angle grinder for cutting 'glass.
 
Top