Adjusted valves according to merc manual and engine wont run

itchyfishnv

Seaman
Joined
Aug 10, 2016
Messages
59
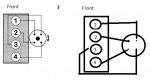
I did a valve adjustment on my 87 3.0l today and the boat would not start after I did the adjustment. I followed the instructions from mercruiser manual #10. I marked the distributor at one and turned the engine by hand until the rotor pointed to cylinder 1 with the point gap open then made the adjustments, I then moved the engine by hand to point to cylinder 4 and made the adjustments. After I reassembled the ignition it basically started backfiring on me and wouldnt start. I noticed there is another method similar where you bring the engine to TDC then adjust, rotate then make the final adjustments. Any idea what I may have done here?
 

itchyfishnv

Seaman
Joined
Aug 10, 2016
Messages
59
I also noticed that #1 on the distributor looks different than how mine is. I've attached a picture of how my plug wires have been connected to the distributor since day one...
 

Attachments

  • firing order.jpg
    firing order.jpg
    32.7 KB · Views: 1

enginesilo

Petty Officer 1st Class
Joined
Jun 9, 2008
Messages
355
I have never done the job but I did save a video on valve adjustment for the future. Maybe watch and see if this holds any clues?
https://youtu.be/QAlCVA5cCQM

Although timing and spark can easily be the issue as well. I'm sure someone with knowledge will share info soon.
 

itchyfishnv

Seaman
Joined
Aug 10, 2016
Messages
59
Yeah I have watched that video multiple times, but I was guess I'm not sure if that video would apply for an older engine? If that's the case, that would make it a bit more simplistic to adjust. If I can do the way as described in the video... how do I start over from scratch? Should I loosen all the nuts, put cyl #1 on TDC w/ the mark on zero and begin the first part of the adjustment? Rotate 360 degrees, line up with zero (on cyl 4) and do the remaining 3 vales? Just to confirm, to get cyl 1 on TDC, the first valve should not move, correct? if it does that means on cyl 4? Would I have caused any internal damage to the engine by attempting to start it?
 

Bt Doctur

Supreme Mariner
Joined
Aug 29, 2004
Messages
19,365
The valves are left to right 1,2,3,4 E.I,I,E.E.I.I.E
rotate the motor untill the 2nd valve opens and closes , this is #1 compression . Adjust both valves.
Rotate motor untill the 3rd valve opens and closes, this is #2 compression, adjust both valves.
Rotate motor untill number#6 valve opens and closes, this is #3 compression, adjust both valves.
Rotate motor untill # 7 valve opens and closes, this is #4 compression, adjust both valves
 

itchyfishnv

Seaman
Joined
Aug 10, 2016
Messages
59
So this is completely different from what manual states, was it wrong or was I looking at the wrong thing?

When you say adjust both valves, you mean for that cylinder, correct? I.e. "rotate the motor untill the 2nd valve opens and closes , this is #1 compression . Adjust both valves." So now. adjust exhaust valve and intake valve for cylinder 1... am I right? Sorry for sounding so dumb, I have not much experience with this type of work :)

Also, I've been doing some research on how engines actually work, by turning the engine to #1 compression, #2 compression, etc, is that putting each cylinder on TDC?
 
Last edited:

itchyfishnv

Seaman
Joined
Aug 10, 2016
Messages
59
When cyl #1 is at TDC on the compression stroke, should the mark on the torsional dampener line up with zero on the tab? because it doesn't its like 14 degrees after, maybe more.
 

alldodge

Moderator
Staff member
Joined
Mar 8, 2009
Messages
42,745
Your probably not getting to "zero lash" correctly.

Back off the nut, take your fingers and fell the up and down slop, slowly tighten the nut until all up and down movement is gone, this is zero lash. You will still be able to rotate the push rod, but this does not matter, its the up and down play you want to remove. Now tighten further 1 full turn.

You can also adjust the lifters with the motor running, its a bit messy but works.

Also make sure you have the firing order and distributor rotation in order, 1-3-4-2 clockwise
 

itchyfishnv

Seaman
Joined
Aug 10, 2016
Messages
59
Your probably not getting to "zero lash" correctly.

Back off the nut, take your fingers and fell the up and down slop, slowly tighten the nut until all up and down movement is gone, this is zero lash. You will still be able to rotate the push rod, but this does not matter, its the up and down play you want to remove. Now tighten further 1 full turn.

You can also adjust the lifters with the motor running, its a bit messy but works.

Also make sure you have the firing order and distributor rotation in order, 1-3-4-2 clockwise
Thanks, I can't do the adjustment while its running because I can't get to start again. It just backfires and smokes out of the spark arrestor.

I believe the firing order is correct, it's been connected the same way for the past 29 years. I've attached a picture to show how its connected. Each number on the distributor shows what cylinder the wire corresponds to. Untitled.jpg
 

alldodge

Moderator
Staff member
Joined
Mar 8, 2009
Messages
42,745
No offence meant on the firing order just info for a just in case issue. Many times I have over looked the obvious

In your pic I see the firing order on the distributor is correct, but since I cannot see the wires to 3 and 4, they appear they might be swapped

fetch
 

Fishermark

Vice Admiral
Joined
Oct 19, 2003
Messages
5,617
When cyl #1 is at TDC on the compression stroke, should the mark on the torsional dampener line up with zero on the tab? because it doesn't its like 14 degrees after, maybe more.

Yes - when you are at top dead center then the mark on the balancer should line up with the zero on the tab. You say it doesn't - how then are you determining top dead center?

Also - Why did you adjust your valves in the first place? Was the engine running before you did the work?
 

Bt Doctur

Supreme Mariner
Joined
Aug 29, 2004
Messages
19,365
My post describes an alternate way to adjust valves. Once a intake valve has opened and closed that cylinder is coming up on compression stroke.
This means both valves are now closed.No need to have it at TDC to adjust the valves.
When you assemble a motor you need the #1 piston at TDC so you can drop the dist in the correct position.Meaning the rotor is pointing to #1 in the cap.
When setting the #1 piston at TDC of its compression stroke the indicator line in the balancer should point to "0" on the timing tab. This tells you the balancer has not slipped and the timing line is correct.
 

Bt Doctur

Supreme Mariner
Joined
Aug 29, 2004
Messages
19,365
You may be adjusting them incorrectly to lose compression.Loosen them first so that there is some looseness.As you rotate the motor you will see the pushrod go upward to open the intake valve and then downward untill the intake valve is closed. You must make sure the pushrod is at the bottom of its travel before tightening the nut.
Tighten the nut untill all up and down play is removed . You might be able to spin the pushrod with your fingers at this point. Then go 3/4 of a turn more. Then move on to the next valve.
 

itchyfishnv

Seaman
Joined
Aug 10, 2016
Messages
59
wow. So i backed everything out, turned over the motor a few times, followed your instructions from above. put ignition back together, fire her up and bang up and running in a couple seconds. NOW, what should I do? Should I fine tune it by running it, back out 1/4 at a time (in 10 second intervals) until it clatters then tighten them 1/4 turns in increments of 10 seconds? (until i get to 3/4 turn)

on a side note, your way of doing it w/ the engine cold is about 10 times easier than the mercruiser way...
 

itchyfishnv

Seaman
Joined
Aug 10, 2016
Messages
59
everything appears to be working great so far, no more clatter. Weird thing is, my timing light wouldnt pick plug #1 but picked up all the other ones. Swapped the plug in cyl 1 with cyl 2 and wont pickup when in cyl 2, Could have a bad plug... ?
 

Bt Doctur

Supreme Mariner
Joined
Aug 29, 2004
Messages
19,365
The timing gun us looking for the high voltage discharge in the wire. That cant happen if the plug is grounded internally or the electrode is pushed against the center electrode
 

itchyfishnv

Seaman
Joined
Aug 10, 2016
Messages
59
I replaced the plug and good to go. Starts up first click actually idles at 650 for the first time in i dont know how long. No clatter at all from any of the rockers. I guess next step is to take it the lake and run it. Any suggestions for cleaning the oil off the transom that spat up? :) Seriously Doc, I can't thank you enough.
 
Top