Bayliner Fuel Tank Project

Mark42

Fleet Admiral
Joined
Oct 8, 2003
Messages
9,334
Re: Fuel Tank Problems.... AHHHHGG!

Re: Fuel Tank Problems.... AHHHHGG!

I just placed the tank order with Ocean Link. I hope there is no problem getting the tank made and sent. Just have to wait until Moeller gets the order and confirms availability. I'm keeping my fingers crossed jus to be sure :D
 

Bondo

Moderator
Staff member
Joined
Apr 17, 2002
Messages
71,130
Re: Fuel Tank Problems.... AHHHHGG!

Re: Fuel Tank Problems.... AHHHHGG!

Ayuh,...

I went to that OceanLink site,...

Wow,... Whata data base of tank spec.s.....
It's a Great resourse..... Best 1 I've found on the web, to date...
 

Mark42

Fleet Admiral
Joined
Oct 8, 2003
Messages
9,334
Re: Fuel Tank Problems.... AHHHHGG!

Re: Fuel Tank Problems.... AHHHHGG!

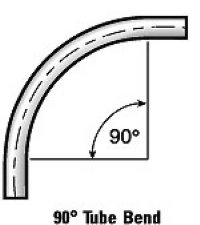
The tank fill hose will need a 90* bend, much tighter than can be made with the rubber fuel fill hose. Also, tight bends in rubber fill hose puts a lot of strain on fittings, and this tank has a molded in fill neck, so I don't want to stress it much at all. I found these aluminum mandrel bent elbows.

Wondering what you guys think about using them for elbows in the fuel fill?

These are 1.5" OD (so the hose will fit over it), 0.065" thick wall, and 2.5" radius bend, for about $8.00

90_317_general.jpg


The radius is available from 2.5" up to 24". The elbow has 3" of straight pipe on each end of the bend, so there is plenty of room to double clamp (as per USCG specs). Also available in stainless steel. Each piece of pipe needs to be bonded. Aluminum wire is probably the best choice.

The tank won't be shipped until mid January, so details on where the fill plate will go and what elbows are needed will have to wait until then.
 

sschefer

Rear Admiral
Joined
Nov 13, 2008
Messages
4,530
Re: Fuel Tank Problems.... AHHHHGG!

Re: Fuel Tank Problems.... AHHHHGG!

No problem at all, polybutyl works fine also. You can have the hoses bent to fit. Better equiped radiator shops can do it. I had one custom bent for my 14' when I had the same exact problem. My brother used the polybutyl fittings. We soaked them in gasoline for a week and they didn't break down. They are still in his boat after two years and are fine.
 

Mark42

Fleet Admiral
Joined
Oct 8, 2003
Messages
9,334
Re: Fuel Tank Problems.... AHHHHGG!

Re: Fuel Tank Problems.... AHHHHGG!

Thanks for the tip on polybutyl. I'll look into that too.

Guess I could use copper. I think a 1-1/4" copper fittings are actually 1-1/2" on the outside. Cheap, lots of fittings, easy to work with.

Can never have too many options!
 

Mark42

Fleet Admiral
Joined
Oct 8, 2003
Messages
9,334
Bayliner 1600 Capri Cuddy: Permanent Fuel Tank Project

Bayliner 1600 Capri Cuddy: Permanent Fuel Tank Project

Came home today and found the Moeller tank was here! Woo Hoo! Unpacked it and put it on the table and it sure looked big. So big I had to measure to make sure it was the same as the specs, and it is. Phew! And it came with the better WEMA fuel sender! So far so good!

Attached with a tie wrap are two angle brackets that I initially thought would work to mount the tank, but if you closely at the photos, one pair of bracket threaded inserts is on the side of the tank, the other on the top. So the mounts won't work for me. The reason the mounts are in odd locations is this tank was designed for a particular boat manufacturer's specific model. It wasn't intended for sale to the general public. I think I'll install it with tie down straps or maybe 3/4" x 1/8" aluminum stock.

Noticed the manufacture date is 01/07/09, serial number 01. So they made this one just for me!

Ain't she a beauty! LOL!

8489.jpg


8490.jpg


I updated the title of the thread now that I actually have the tank in my hands (was titled Fuel Tank Prolems - AAAHHHHH). I think I'll keep it going as the thread for the fuel tank project.
 

Bob_VT

Moderator & Unofficial iBoats Historian
Staff member
Joined
May 19, 2001
Messages
26,068
Re: Bayliner Permanent Fuel Tank Project

Re: Bayliner Permanent Fuel Tank Project

That is sure pretty! You sure you want to mess it up and put gas in it!! ;)
 

Mark42

Fleet Admiral
Joined
Oct 8, 2003
Messages
9,334
Re: Bayliner Fuel Tank Project

Poly fuel tanks should be set on neoprene rubber to resist scuffing and abrasion to the poly tank. Neoprene rubber sold in sheets of even 1/8" thick is very expensive. I was thinking of using inner tube rubber, but that is not neoprene. Anyone see drawbacks to using inner tube vs neoprene? Or can anyone think of a inexpensive source of neoprene rubber?
 

Mark42

Fleet Admiral
Joined
Oct 8, 2003
Messages
9,334
Re: Bayliner Fuel Tank Project

Temps got up to 40 today, so I took the tank out to the boat for trial fitting and determine what pipe fittings will be needed.

The boat has a cover on it now, but with the hard top on, I can still work inside!

8504.jpg


Its a tight fit, but I did run into one small problem with the fuel pickup. When the tank is mounted with the pickup at the front/left (in photo) it will not access all the fuel when nearly empty because of a slight incline while cruising. But when I reversed the tank, so the pickup is at the rear/right, it hits the bottom of the splashwell and won't go in place.

8502.jpg


Here I took the fill connection out (its laying on the tank) to check clearance. Have about 3/4" where the fitting goes.

8503.jpg


So, I either cut a hole in the splashwell and make a "bump" to cover the fitting, or a super low profile connector is used (doubtful I will find one) or the pickup tube is replaced with a much longer one so it will reach to the rear of the tank when mounted left/front. This last option I think will work.

One nice bit about the way the tank fits is the fill neck clears the splashwell nicely, and if a hose is connected and extends stright out, it will still be under the transom, so no parts of the fill hose/fittings will be sticking out anywhere. Makes it easier to enclose the whole tank for aesthetics.
 

Bob_VT

Moderator & Unofficial iBoats Historian
Staff member
Joined
May 19, 2001
Messages
26,068
Re: Bayliner Fuel Tank Project

Poly fuel tanks should be set on neoprene rubber to resist scuffing and abrasion to the poly tank. Neoprene rubber sold in sheets of even 1/8" thick is very expensive. I was thinking of using inner tube rubber, but that is not neoprene. Anyone see drawbacks to using inner tube vs neoprene? Or can anyone think of a inexpensive source of neoprene rubber?


What about the closed cell foam that is sold as a ground cover for under a sleeping bag? If you have a military surplus store close by or a sporting goods store....... it looks like a bed roll and it is durable.

http://cgi.ebay.com/US-MILITARY-GRE...0|66:2|65:12|39:1|240:1318|301:1|293:1|294:50
 

Mark42

Fleet Admiral
Joined
Oct 8, 2003
Messages
9,334
Re: Bayliner Fuel Tank Project

What about the closed cell foam that is sold as a ground cover for under a sleeping bag? If you have a military surplus store close by or a sporting goods store....... it looks like a bed roll and it is durable.

http://cgi.ebay.com/US-MILITARY-GRE...0|66:2|65:12|39:1|240:1318|301:1|293:1|294:50

Ok, I'll check that out.

I just realized if a longer pick up tube is used (Moeller part MOE33500-24), it will have to be bent to reach to the back of the tank. That won't work because the pickup tube has to rotate as the fitting is screwed in. DUH!!!

Maybe I will cut a hole in the splashwell and layer a few scraps of 1708 I have over a rounded lump of modeling clay to make a cover for the hole.
 

Mark42

Fleet Admiral
Joined
Oct 8, 2003
Messages
9,334
Re: Bayliner Fuel Tank Project

Here is a close up of the problem area. The nut by the letter "A" on the tank towards the rear is the threadded fitting that the pickup tube screws into. There is 3/4" clearance above the nut, and the 90* pickup is about 1-1/4".

Any suggestions (other than cutting a hole in the splashwell) on how to get clearance?

8505.jpg
 

Bondo

Moderator
Staff member
Joined
Apr 17, 2002
Messages
71,130
Re: Bayliner Fuel Tank Project

Any suggestions (other than cutting a hole in the splashwell) on how to get clearance?

Ayuh,... Probably No chance of Lowering the tank, eh,..??

So far, the Bubble in the splashwell looks like the easiest answer...
I was thinking of using inner tube rubber, but that is not neoprene. Anyone see drawbacks to using inner tube vs neoprene? Or can anyone think of a inexpensive source of neoprene rubber?

Inner tube cut into strips to lay flat should be OK,...
Closed-cell packaging foam,..??
Strips of old Winch Straps,.. Seatbelts, Webbing cut off something,..??

Trouble with the Bedrolls mentioned by Bob is, they're 1/2" thick...
Anything you cushion with, Raises the tank,+ takes away from the 3/4" you've got at the top...
it will have to be bent to reach to the back of the tank. That won't work because the pickup tube has to rotate as the fitting is screwed in.

That Can be Done,...
I don't know about the Moeller parts, but I've had tank fittings that accepted a piece of 3/8" nylon air brake line we use on the trucks,...
Once slid down into the tank, I just turned it carefully allowing the spline in the tubing to flop as needed,+ coasked it into place, with a piece of brazing rod thru the fill hole...
Just a Thought,...;)
 

sschefer

Rear Admiral
Joined
Nov 13, 2008
Messages
4,530
Re: Fuel Tank Problems.... AHHHHGG!

Re: Fuel Tank Problems.... AHHHHGG!

Thanks for the tip on polybutyl. I'll look into that too.

Guess I could use copper. I think a 1-1/4" copper fittings are actually 1-1/2" on the outside. Cheap, lots of fittings, easy to work with.

Can never have too many options!

Copper, are you insane, sell them to a customer! LOL.. I come from a long line of plumbers.. I learned the trade but decided I'd rather do something different.

Actually, we tried copper and it turned green in short order. I wasn't sure if it would contaminate the fuel or not so rather than risk creating a new problem we used the pb instead.
 

Mark42

Fleet Admiral
Joined
Oct 8, 2003
Messages
9,334
Re: Bayliner Fuel Tank Project

Ayuh,... Probably No chance of Lowering the tank, eh,..??

So far, the Bubble in the splashwell looks like the easiest answer...

Here is a shot without any thank. The tank basically sits on a board that is at the lowerst point of the stringer on either side. So going lower is not really possable. And the tank base could be structural too, so I really don't want to mess with it.

8475.jpg


When I get in there, I am amazed at how well Bayliner coated everything with CSM and gel coat. And then the go and do something dumb like use regular steel nuts on the stainless transom eye's. Those rust stains are not from leaking water through the transom, its just from condensation on bare steel nuts on the stainless transom eye. I took the one off on the port side to inspect the transom, and it is dry as a bone with lots of 3M4200 sealing it all up. Go figure.
 

Utahboatnut

Senior Chief Petty Officer
Joined
Jan 15, 2009
Messages
785
Re: Bayliner Fuel Tank Project

Is there any way to lengthen the pickup tube with something flexable that would allow you to still thread it on. Like a piece of fuel line with a weight close to the end to somewhat hold it in place towards the rear of the tank. Maybe I'm way off just throwing stuff out there. Is there enough clearance to shim with the neoprene a bit more in the back or is it too tight as is. Hope you can figure something out.
 

sschefer

Rear Admiral
Joined
Nov 13, 2008
Messages
4,530
Re: Bayliner Fuel Tank Project

Interesting observation about the finish details. My Starcraft is built by Brunswick also. The hull is great but the finish work was cra----. If I had to guess I'd say one side of the shop was Union and one side was day labor. Your's probably called for stainless but nobody on that side of the shop knew the difference.

Regarding the bottom of your tank being structural, it isn't, you need to keep it supported or it will suck down the top and colapse in on itself.
 

Mark42

Fleet Admiral
Joined
Oct 8, 2003
Messages
9,334
Re: Bayliner Fuel Tank Project

I spent a couple hours after work in the hardware and plumbing section of Lowes. I gave up on trying to make a low profile pickup or to extend the pickup tube because the bottom line is it will cost a lot to do that, and drilling a hole in the splashwell to get the clearance is cheap. So I'm keep the original pickup tube and fittings. Cutting a 2" diameter hole in the splash well. That will let me install the tank, then drop the pickup tube down through the splashwell and screw it in place. At this point, it will only stick up through the plashwell maybe 1/4" or so. The splashwell is rather thick there, looks like plywood with csm and woven fabric on the under side.

To cover the 2" hole, I picked up a round 3" grey (outdoor) PVC electric box. It has a round lid that attaches with a rubber gasket and 4 stainless screws. I'm going to cut off the bottom 1-1/2" of the electric box, making it only about 3/4" high, and epoxy to the splashwell. That will be the access method, and it will seal well, and only cost $6.00. Poor man's access deck plate. :)

Well, let me get to cutting the box. Pic's to follow....
 

Mark42

Fleet Admiral
Joined
Oct 8, 2003
Messages
9,334
Re: Bayliner Fuel Tank Project

Ok, so this is how I made the custom deck plate.

Buy 3" round outdoor pvc electric box:
8507.jpg


Cut the top 3/4" off the box. The bottom is now garbage.
8508.jpg


A little sanding, apply the top and its done.
8509.jpg


Now it has to be contour sanded to match the curves of the splashwell. I realized after finishing it that the screw bosses extend the full height of the piece. That means it can be screwed to the splashwell from screws coming up from underneath the splashwell. A little bit of Boatlife sealer and its a done deal.

I know its not the prettiest deck plate ever invented, but it will work and its in the splashwell where it won't be seen much, and its UV safe. Besides,at about $6 it keeps me on budget.
 

Mark42

Fleet Admiral
Joined
Oct 8, 2003
Messages
9,334
Re: Bayliner Fuel Tank Project

Temps rose up into the 40's today, so I went out and worked on the splashwell. Cutting a hole in the splashwell was something I was really trying to avoid. Turns out it was quick, easy, didn't have to modify the fuel pickup, and the home made deck plate doesn't look bad to me at all. This is how it went:

Cut a 3" hole and the pickup tube drops right in.
8515.jpg


Screwed in the pickup tube loosely and there was still space to attach the hose barb from above. Will have to paint the sides of the hole with some resin to seal it up. The 4 dots are pencil marks for drilling the holes for the screws that will attach the deck plate.

8516.jpg


From below, there is enough clearance for the hose and a clamp, especially after tightening down the 90* fitting. And if more space is needed, the bottom of the splashwell can have a recess ground into it. The hole showed a 1/2" plywood core in the splashwell, so there is plenty of material to work with if needed.

8517.jpg


The deck plate is hardly noticable, I don't know if I'll bother to paint it, because then if it gets scratched, it means maintenance. UV proof grey is OK with me. The deck plate was marked and sanded with a small disk sander in a cordless drill to match the contour of the splashwell. One screw coming up from below holds it in place until I get stainless steel screws and some 3M 5200.

8519.jpg


So what do you think? Does it look cheezy or OK or OEM?
 
Top