Hull repair on 1990 boat

Woodonglass

Supreme Mariner
Joined
Dec 29, 2009
Messages
25,929
WOW!!! It's looking really good so far. I'm impressed with how you've kept the shape of the strake. Nice job. I'd recommend another layer of CSM on the inside and a couple more of 1708 before moving to the exterior.
 

500dollar744ti

Senior Chief Petty Officer
Joined
Jul 23, 2012
Messages
691
Thanks!!

So today I came out to find my first layer of CSM had cured..
IMAG0575_zpsa676cd9b.jpg


I cleaned the area with acetone, prepped and added another layer of CSM..
IMAG0577_zps86036121.jpg

IMAG0579_zps81a15b9d.jpg


I had to go to the mall with my girlfriend to go shopping this afternoon and that took a few hours. However, when I got home I removed the packing tape from the outside of the hull and my hole is closed up, making it look a lot less scary..
IMAG0584_zpsbd199cb9.jpg

IMAG0585_zps6cfaf19d.jpg


I actually added a third layer of CSM on the inside after taking these pics but it hadn't cured enough for me to start with the 1708 so I'm going to do that tomorrow morning.
 

jimmy wise

Petty Officer 1st Class
Joined
Sep 6, 2012
Messages
288
go back wood tells you the timing to ad the layers. prep all mat and 1708 so you can layer it quicker. your work is very impressive. nicely done and very professional looking. welli take that back alot of pros butch up stuff
 

500dollar744ti

Senior Chief Petty Officer
Joined
Jul 23, 2012
Messages
691
Today I added my first layer of 1708..


Then another layer..


Then I mixed up some filler and filleted the stinger, put my first layer of 1708 over that, and there's also another layer of 1708 over the hole waiting to be glassed..


Both are curing..


So now I have 2 layers of CSM then 3 layers of 1708 on the hole itself and I got a fillet on the stringer and 1 layer of 1708 on that.
 

500dollar744ti

Senior Chief Petty Officer
Joined
Jul 23, 2012
Messages
691
SInce I am also going to have to do some work on the outside, I sanded away all the gelcoat and started fairing the glass to get ready for CSM on the outside.. I was getting tired/hungry and decided to call it a night.
 

jimmy wise

Petty Officer 1st Class
Joined
Sep 6, 2012
Messages
288
nice job, your glass work is pretty. looks like you have a great bond this time and it wont flex
 

Woodonglass

Supreme Mariner
Joined
Dec 29, 2009
Messages
25,929
In the 5 years that I've been hangin around this forum, I'm certain that this is some of the finest DIY glassin of a strake that I've seen. This is NOT that easy to do well, and you have done it well!!! I commend you on your efforts. I'm 100% certain you won't be having any more issues in this area with cracking.!!! You get one of these...
 

500dollar744ti

Senior Chief Petty Officer
Joined
Jul 23, 2012
Messages
691
Thanks jimmy!

In the 5 years that I've been hangin around this forum, I'm certain that this is some of the finest DIY glassin of a strake that I've seen. This is NOT that easy to do well, and you have done it well!!! I commend you on your efforts. I'm 100% certain you won't be having any more issues in this area with cracking.!!! You get one of these..

THANKS! I really appreciate it!

I still need to do multiple layers of 1708 on the stringer and bulkheads but not until I finish the work over the strake. I think I'll add one more later of 1708 on the inside of the strake and do my first layer of CSM on the outside.

I will be laying up glass on the outside almost vertically, should I use Cabosil to thicken the mix or can I get away with resin as long as it is wetted out well and doesn't start to sag?
 

500dollar744ti

Senior Chief Petty Officer
Joined
Jul 23, 2012
Messages
691
While I've got your attention, I spotted this yesterday, it's the left side of my port trim tab. The discoloration around what looks like a crack is what caught my attention..
c684ed62-ccda-41a9-8ba9-ebfead6b0998_zps1d8808ab.jpg


I gave it a quick sanding..
IMAG0608_zps3362a032.jpg


Should I be concerned about this? I'm not really sure what to do about it, if anything..
 

Rickmerrill

Senior Chief Petty Officer
Joined
Mar 13, 2014
Messages
686
I was wondering where this question went. Looks like a rust stain. Did the crack disappear after sanding? I don't see it anymore in the picture.
 

500dollar744ti

Senior Chief Petty Officer
Joined
Jul 23, 2012
Messages
691
On the back near the trim tab, it does look like a small crack is there when I examine closely.. should I just hit it with some 5200?

Also, today I did more sanding, I'm trying to clean out the compartment adjacent to the repair area so I can fillet that side of the bulkhead and tab it up. I found some more roving that is separated and I'm taking care of that. I had to do a lot of the sanding up in the corner of the compartment with a dremel, that's why I spent all afternoon on it and don't have much to show for it.


Rickmerrill

Senior Chief Petty Officer
Joined
Mar 13, 2014
Messages
686
No, I wouldn't advise 5200 for a transom crack.. Are those bolts or screws holding the trim tab onto the transom? Anyway to get inside access? What are the trim tab brackets mad of, try a magnet.
 

500dollar744ti

Senior Chief Petty Officer
Joined
Jul 23, 2012
Messages
691
They are SS lag screws, no bolts and no real way to get inside access without pulling the engine. I'll have to see what the brackets are made of. What about marine epoxy or marine tex to patch that up? Since I'm glassing all this other stuff, I could sand it down and get a couple layers of CSM over it..
 

Woodonglass

Supreme Mariner
Joined
Dec 29, 2009
Messages
25,929
A really good method for "Upside down" and Vertical work is to make your patch on a piece of plastic on the bench in reverse. In other words lay the largest layer down first then the next smaller one and so on. i.e. 8" wide CSM, 6" wide CSM, 4" wide 1708, 2"Wide CSM. Wet em all out at the same time then pick up the entire thing, plastic and all and carry it to the boat and slap it on using a bondo spreader to smooth it out. I'd mix the resin @ 1.5% MEKP so it would kick pretty fast. Don't want to press to hard at first and squeeze out all the resin. Use the plastic as a backer and use smooth from the center out to the edges, Keep spreading and you'll feel it start to warm up as it cures. Warmer it gets the harder you can press and spread. The added benefit of doing it this way is the plastic blocks the air from the resin and it'll cure tack free and be ready for sanding. This method really works well for vertical layups.
 

Rickmerrill

Senior Chief Petty Officer
Joined
Mar 13, 2014
Messages
686
It might be better to concentrate on the first fix before getting to the transom crack, really up to you. If it was me I think I'd pull that trim tab to see if if the lags are somehow involved. Call it a feeling. I may be crazy, and I can't see everything you can, and I know you plan a full restore later and might only want to just seal it up. It's easy being a back seat driver when you don't have to actually do the work! You're doing a great job and I've really got to hand it to you working in the heat and doing everything "in the hole". It's going to a much stronger fix this time especially since you replaced all that delaminated woven.
 

500dollar744ti

Senior Chief Petty Officer
Joined
Jul 23, 2012
Messages
691
Yes, thank you! I'll worry about the other spot to repair later.

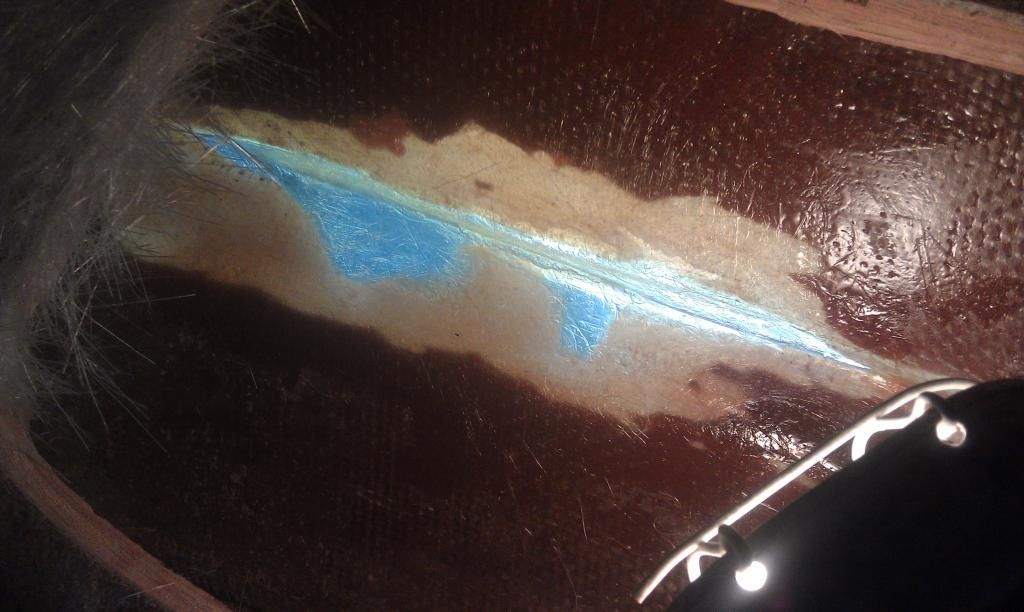
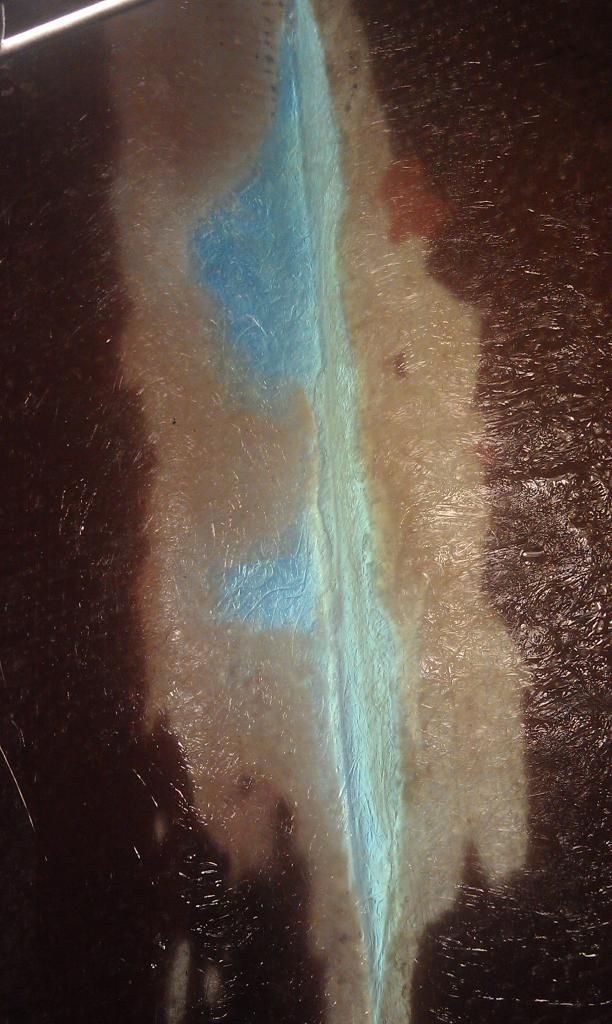
I'm almost done sanding in the other compartment so I can adequately tab the other side of the bulkhead. It looks like there's crack in the bulkhead wood but I tried reaching in there and seeing if the wood is damaged or anything and it feels strong. That crack looking thing is not on the other side, I'm really not sure what is it but it doesn't concern me. I will be filleting and glassing both sides.


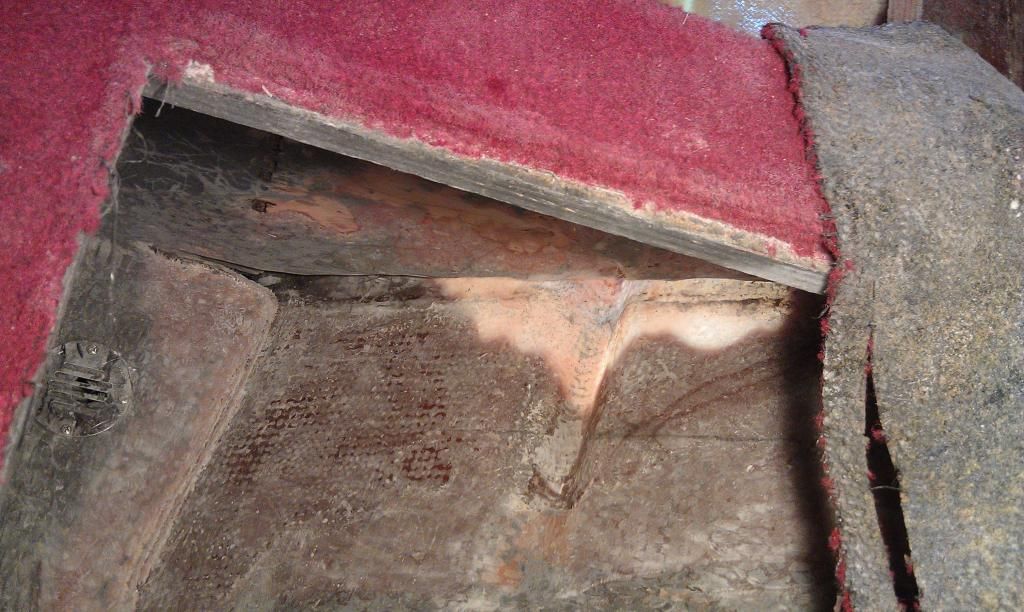
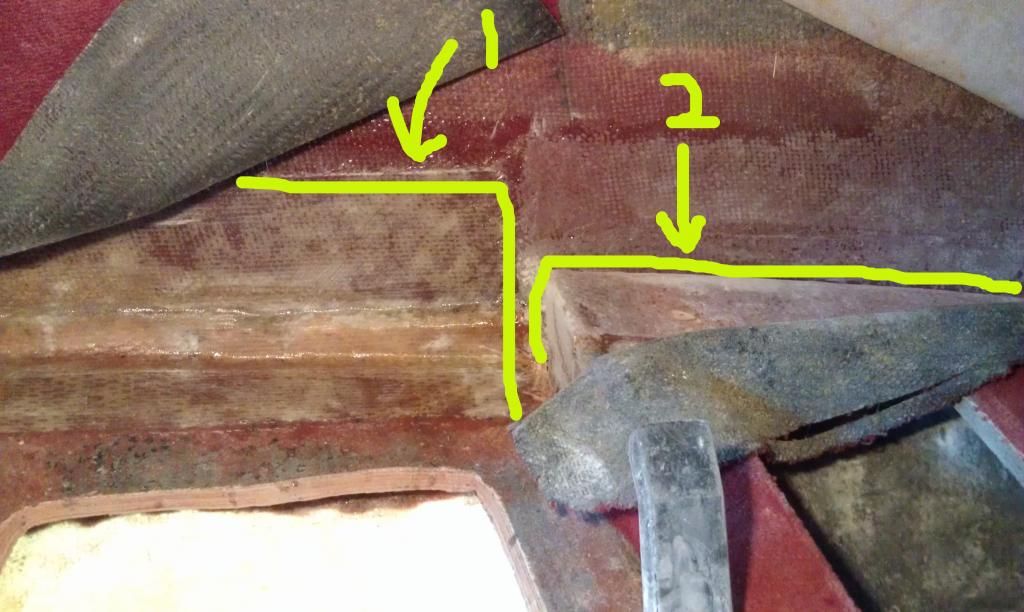
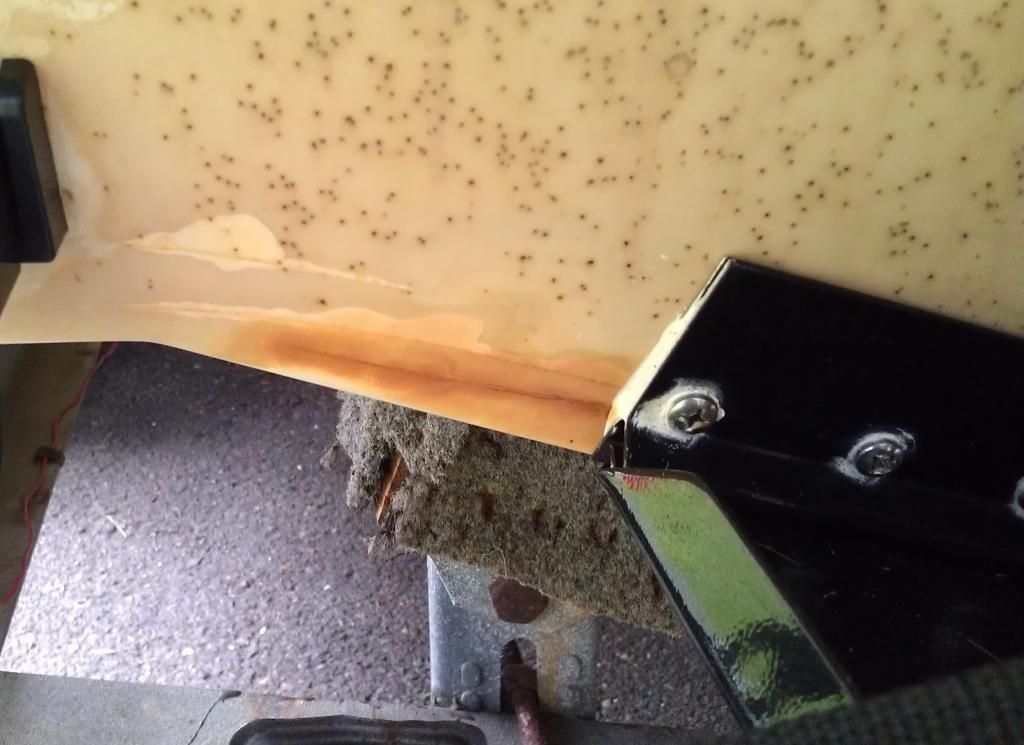
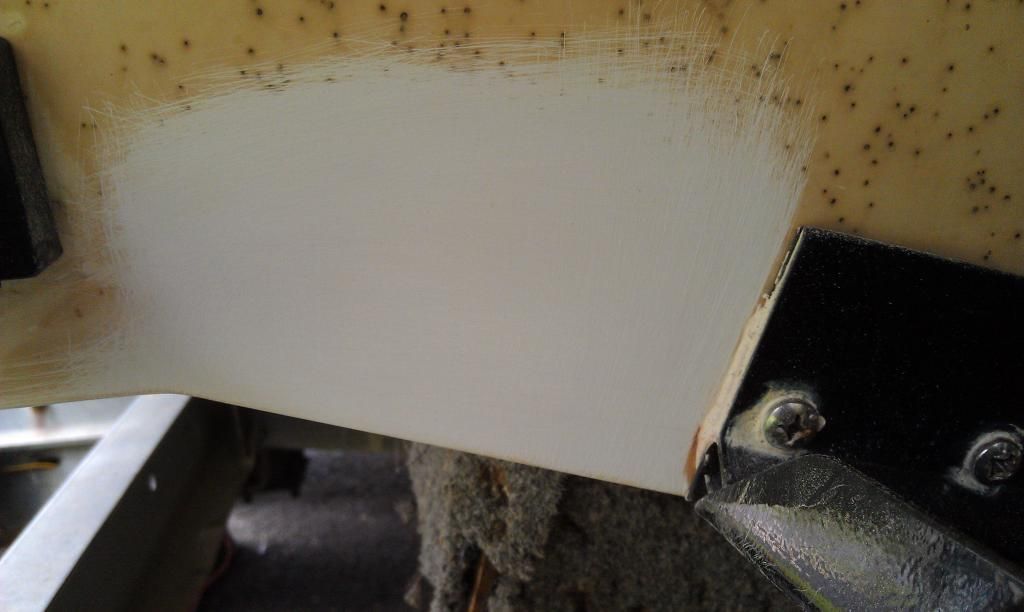
SO while I'm sanding away at the compartment forward of my hull repair, I see more things that need fixing. #1 is where I attempted to tab the cabin floor to the hull, It looks like garbage to me now and I am wondering if I should rip it off and re-do it? I tried prying at it and it seems to hold strong. That brings me to #2 which I also tried to tab, that didn't work so well and I ripped it off and sanded it down. I attempted to tab these when I was trying to fix the second time it cracked, before all the proper repairs I'm doing now.

Anyway, the outlined area of #2 was only tabbed to the hull, even though there's a big gap from the wood to the hull. Is that an area that I can fill with PB? I would like it to be rigid but if there's a good reason it wasn't filleted in the first place I will not do it.
 
Last edited:

500dollar744ti

Senior Chief Petty Officer
Joined
Jul 23, 2012
Messages
691
So, should I fillet the gap in the #2 area above and then tab it or just tab it without a fillet?
 
Top