MV-2 Control on 1996 Regal Rush xp120 jet boat

RogerASki

Seaman
Joined
Aug 25, 2013
Messages
73
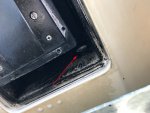
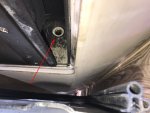
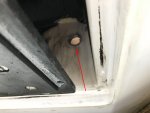
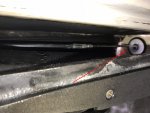
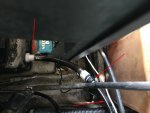
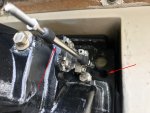
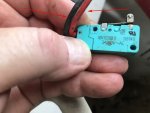
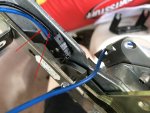
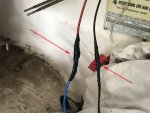
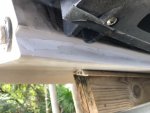
9 out of 10 screws out! Last one, at rear of plate above gate turns very, very slow! Sprayed PB twice and will again let sit overnight. Taking lots of precautions NOT to break screw(s).
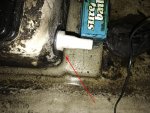
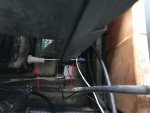
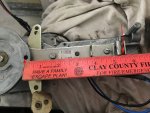
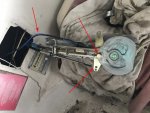
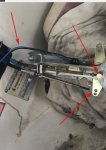
Try again tomorrow and hopefully get ride plate off and take more photos.
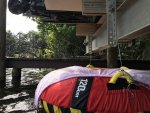
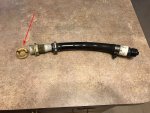
ski
 
Last edited:

RogerASki

Seaman
Joined
Aug 25, 2013
Messages
73
Thanks ALLDODGE!! It was hard to wait overnight Friday while the PB soaked into the last screw at the rear of the ride plate. But yesterday I was able to remove it after spraying PC compressed air, which I use to blow off my computers. It got the screw very cold which helped it contract a little. I then placed a 3 ft 2x2 between the ride plate and the pump housing and pried the plate very gently. It came right off!!! I could now see the inside of the thru hull hole.
I now need to clean the hole area, purchase some parts and put the whole thing back together. I will continue to add as I get to completion. Thanks for your help!
Regards,
Ski
 

Attachments

  • photo298500.jpg
    photo298500.jpg
    952 KB · Views: 0
  • photo298501.jpg
    photo298501.jpg
    1.2 MB · Views: 0
  • photo298502.jpg
    photo298502.jpg
    842.3 KB · Views: 0
  • photo298503.jpg
    photo298503.jpg
    598.2 KB · Views: 0

alldodge

Moderator
Staff member
Joined
Mar 8, 2009
Messages
42,673
Wow, didn't realize you were working from a tube. hope you didn't loose anything in the water while doing so
 

RogerASki

Seaman
Joined
Aug 25, 2013
Messages
73
Actually I dropped the vent screw to the drive gear oil. Tried a spotlight, large magnet then finally a mask. Luckily I was able to retrieve it. With that experience, and 10 screws to remove, I wasn't going to take any chances so I used the grandkid's tube with a towel in it to catch anything that dropped. I can stand under the boat lift - no problem!
 

RogerASki

Seaman
Joined
Aug 25, 2013
Messages
73
Has anyone replaced the foam exhaust seals on a sport jet 120 without dropping the pump? While working on the above broken control/shift cable I removed the ride plate. I noticed that the seals are pretty deteriorated and need replacing. Any advice is appreciated.
Thanks,
Ski
PS I will post photos as soon as I reduce their size.
 

RogerASki

Seaman
Joined
Aug 25, 2013
Messages
73
I will make another post pertaining to the Foam Exhaust Seals and include photos. Thanks, Ski
 

RogerASki

Seaman
Joined
Aug 25, 2013
Messages
73
I have completed the installation of the new thru hull connector and xtreme control/shift cable. Photos attached. I will begin installing the CH2300P Control box this weekend.
This project expanded from replacing the control cable to include replacing the control box, the thru hull connector, a foam exhaust seal, replace the drive gear oil and marine epoxy some fine scratches underneath the ride plate. A little more extensive than I expected, but it needed to be done!
 

Attachments

  • photo299426.jpg
    photo299426.jpg
    485 KB · Views: 0
  • photo299427.jpg
    photo299427.jpg
    1.2 MB · Views: 0
  • photo299428.jpg
    photo299428.jpg
    659.7 KB · Views: 0
  • photo299429.jpg
    photo299429.jpg
    532.8 KB · Views: 0
  • photo299430.jpg
    photo299430.jpg
    593.4 KB · Views: 0
  • photo299431.jpg
    photo299431.jpg
    671.3 KB · Views: 0
  • photo299432.jpg
    photo299432.jpg
    684.1 KB · Views: 0

RogerASki

Seaman
Joined
Aug 25, 2013
Messages
73
Thanks AllDodge! Have a detour in the boat project today. I’m replacing some dock/deck boards and step handrails. Seems like always something to do. :(
Keep you posted about installing control box!
Ski
 

RogerASki

Seaman
Joined
Aug 25, 2013
Messages
73
New issue - color codes of wiring to neutral switch in control box!
Old Morse MV-2 has two wires to switch from boat - both are yellow/red. They are connected to the black and red wires on the switch. The new CH2300P control box’s neutral switch has two wires that are black and blue. So which wire goes where? Anyone know?
Thanks,
Ski
 

RogerASki

Seaman
Joined
Aug 25, 2013
Messages
73
Supporting photos.
 

Attachments

  • photo299692.jpg
    photo299692.jpg
    180.9 KB · Views: 0
  • photo299693.jpg
    photo299693.jpg
    623.7 KB · Views: 0
  • photo299694.jpg
    photo299694.jpg
    474.6 KB · Views: 0
  • photo299695.jpg
    photo299695.jpg
    725.2 KB · Views: 0

RogerASki

Seaman
Joined
Aug 25, 2013
Messages
73
Kind of confused! Illustration from Shop Manual indicates a yellow/red wire that has the neutral switch in it, meaning it does not matter how I attach the black and blue wires of the new neutral switch on the ch2300p control. It is all on one wire - yellow/red.

The illustration from the Service Manual shows a yellow/red wire from the ignition switch to one side of the neutral switch. The other wire is yellow going to the solenoid from the other side of the neutral switch. Two different wires? Any help is greatly appreciated.
Thanks,
Ski
 

Attachments

  • photo299700.jpg
    photo299700.jpg
    118.8 KB · Views: 0
  • photo299701.jpg
    photo299701.jpg
    350.2 KB · Views: 0

alldodge

Moderator
Staff member
Joined
Mar 8, 2009
Messages
42,673
Take an ohm meter and measure the old contacts in neutral, it's probably making a connection when in neutral. If it makes contact check which 2 wires make connection in neutral
 

RogerASki

Seaman
Joined
Aug 25, 2013
Messages
73
Hi, checked both, old and new, neutral switches. Old appears to be a normally open. When pressed ohm meter indicates continuity. The new appears to be normally closed. When pressed ohm meter indicates no continuity.
I went ahead and connected red to blue and black to black. Here's some photos.
 

Attachments

  • photo299788.jpg
    photo299788.jpg
    763.3 KB · Views: 0
  • photo299789.jpg
    photo299789.jpg
    661.3 KB · Views: 0
  • photo299790.jpg
    photo299790.jpg
    716.1 KB · Views: 0
  • photo299791.jpg
    photo299791.jpg
    742.7 KB · Views: 0
  • photo299792.jpg
    photo299792.jpg
    653.8 KB · Views: 0

alldodge

Moderator
Staff member
Joined
Mar 8, 2009
Messages
42,673
Your previous image showed the new with 3 wires. Having 3 wires I would thing that one side would be closed and the other would be open

fetch
 

RogerASki

Seaman
Joined
Aug 25, 2013
Messages
73
Hi, according to instructions the gray wire is not used and is sealed in the shrink tubing out from the new neutral switch.
I’m getting ready to disconnect throttle cable from tower shaft and finish installing the control/shift cable and mount the CH2300P control to the bulkhead. Keep you posted!
Man this is a long project, but I keep thinking what the marina wanted for repair - $1000 to $3000!
 

RogerASki

Seaman
Joined
Aug 25, 2013
Messages
73
You can see the shrink tube further down the two wires.
 

Attachments

  • photo299830.jpg
    photo299830.jpg
    414.2 KB · Views: 0

RogerASki

Seaman
Joined
Aug 25, 2013
Messages
73
It’s been a few days because when I tried to find the correct eye terminal for the xtreme ccx63310 control cable I was told by the manufacturer that it is NOT the right cable!!! Plus once connected to the clamp on the nozzle it was too long!!
The cc21310 is the right cable!!! It comes with the eye terminal already built in!
So I took the xtreme cable out, returned it, and purchased the cc21310 control/shift cable. Should be here by Saturday.
While waiting I marine tec epoxied the slight cracks in the gelcoat in the areas the ride plate goes. After it dried I used coarse 60 grit and fine 220 grit to smooth out! I also enlarged the opening in the bulkhead to accept the new CH2300P control box and installed it.
Now just waiting on the cable! More to come!
PS I’m not too disappointed about the cable! It is better to have it right than to Jerry-rig it!
 

RogerASki

Seaman
Joined
Aug 25, 2013
Messages
73
[No message]
 

Attachments

  • photo300353.jpg
    photo300353.jpg
    82.3 KB · Views: 0
  • photo300354.jpg
    photo300354.jpg
    73.4 KB · Views: 0
  • photo300355.jpg
    photo300355.jpg
    83.5 KB · Views: 0
  • photo300356.jpg
    photo300356.jpg
    67.9 KB · Views: 0
Top