I/O (Sterndrive) Conversion to Outboards

Pmt133

Lieutenant Junior Grade
Joined
Jan 6, 2022
Messages
1,180
Someone definitely asked if they could test fit them first.

I remember how much of a nightmare selling my 3.0l was.
 

tpenfield

Moderator
Staff member
Joined
Jul 18, 2011
Messages
18,668
Are they still available? Is the price negotiable? Would you consider $1000 for the pair? :ROFLMAO::LOL::oops:
It gets worse . . .

Would you sell just the engines? (no . . . they don't work without the controls and wiring)
I'm a Merc Tech, I know this stuff . . . (no you don't)
How many hours? What year? (the listing has all the info)
I just need the throttles . . . how much for those? (same price as the total package . . . . )
I pooped myself when I saw the price (boating is probably not for you, try to get a complete twin engine package for less)
 
Last edited:

tpenfield

Moderator
Staff member
Joined
Jul 18, 2011
Messages
18,668
Sunday was a fun day . . . Patriots football . . . narrowly escaping defeat 🤪
We get there fairly ealry and have the pick of the tailgating spaces . . .
IMG_8780.JPG
.
IMG_8784.JPG
.
IMG_8788.JPG
.
Today is back to business, but the weather might have its input on how much gets done . . .
.
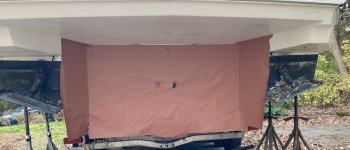
I got some detailed dimensions and patterns off of the transom. I used paper to create a template for making the shapes. It seemed to work out OK.
.
IMG_8789.JPG
.
There are 4 pieces that will make up the contact area of the extension pod: 3 pieces on the transom and 1 piece on the underside of the swim deck. I figured it was best to template the transom-mating pieces and the 'upper' piece can be made from measurements.

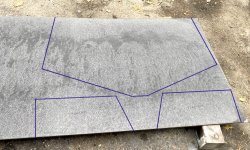
After some marking, cutting and 'truing' up the shapes, here is what I have to outline the pieces on the Coosa board.
.
IMG_8792.JPG
.
IMG_8796.JPG
.
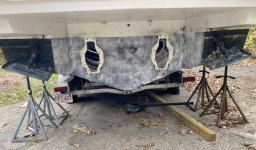
These are the sides that will mate to the transom. I got to bang the rust off my geometry skills and figure out the bevel angles on the cuts. . . basically 12Ëš and 60Ëš from my previous measurements.

I also have treated the transom contact areas with paint remover . . . probably going to need to soak in for a couple of days.
.
IMG_8795.JPG
.
My plan is to get as exact enough fit to the transom that when the extension pod gets mated to the transom, the adhesive used to seal the extension can be uniform thickness, not having any excessive gaps to fill.
 

tpenfield

Moderator
Staff member
Joined
Jul 18, 2011
Messages
18,668
Progress Update . . .

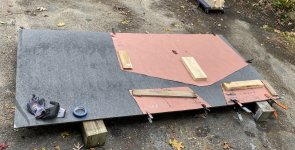
Lots of measuring and cutting today. I'm into 3 of the Coosa panels . . .
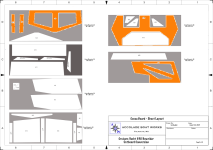
Here is what I've cut out so far (highlighted in orange).
.
CY-338-Coosa-Panel-Layout-B.png
.
The big top piece (upper right in the picture) took a while to get just right. The other pieces were not too bad . . . lots of figuring on the bevel cuts so things will go together nicely.

My plan it to assemble these 5 pieces and test fit them to the transom contact area. I'll need to provide allowance for the fiberglass thickness . . . got to figure out what would be a good approach.
 

tpenfield

Moderator
Staff member
Joined
Jul 18, 2011
Messages
18,668
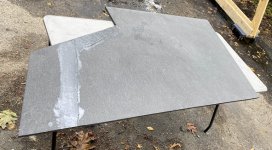
Some how, I managed to cut one of the pieces wrong. So, I got to practice glassing the Coosa board.
.
IMG_8797.JPG
.
All set . . . don't do it again 🤪
 

redneck joe

Supreme Mariner
Joined
Mar 18, 2009
Messages
13,507
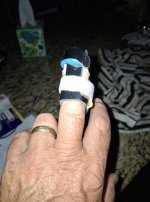
And not rush and forget safety protocols. Didnt see any bone and flesh is gluing back together this morning and bandage change

1762366773183.jpeg
 

tpenfield

Moderator
Staff member
Joined
Jul 18, 2011
Messages
18,668
Yup, it was one of those things . . . asked myself should I cut out one more piece and call it a day . . . Doh 😖
 

tpenfield

Moderator
Staff member
Joined
Jul 18, 2011
Messages
18,668
In other news . . .

I have the 4 'transom mating' pieces secured to the transom with a about a 3/32" 'spacer' all around to mimic the fiberglass thickness. (Pics to follow in the AM.)

Temperatures barely hit 60ËšF today . . . more like 57ËšF. I am having to tent the work area after the glass layup and apply heat. Much of the fabrication/glassing will be done in the garage, which can be heated to about 68ËšF. For the stuff that has to be done outside, I'll have to figure out a better method of tent + heat. Right now, I'm using 2% MEKP and kicking the resin with a heat gun in some cases.
 

Pmt133

Lieutenant Junior Grade
Joined
Jan 6, 2022
Messages
1,180
You could probably preheat the resin in a warm bath to help too... Starting with uncatalyzed resin at 75-80 degrees may help?
 
Top