I originally started using polyester resin in two small patches on the forward stbd and port. I kept having a debate with myself if I was using the right resin as I don't have any intention of selling it. I switch to epoxy as its stronger, more flexible and adheres better. And never want to rip this boat apart.
epoxy/polyester, work with whatya want both are fine for our applications but once you switch to epoxy you can never go back to poly as it wont stick and epoxy comes with its own set of issues .
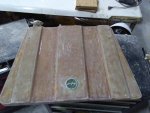
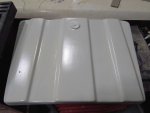
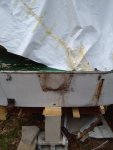
That last picture was the forward section you can see round stiffeners. The hull looked and felt thin. My boat is actually a 1962 Lyncraft Seabreeze Contessa 1900. I think the hull laminate schedule was a 4 oz and a 24oz boat cloth. My plan was to laminate with epoxy around the old stringers before I ripped the old stringers out. As I felt the hull was on the thin side. I read in another forum they called Lyncraft boats thincraft because they were built thin.I ended up ripping out the stringers and putting 3 layers of 17oz using Raka epoxy resin.
This next photo is a glob of fiberglass. The previous owner told me in order to save money on fiberglass I could use fiberglass porch screen but I know a lot better than that. Also is a look at what I believe is 24 oz fiberglass boat cloth
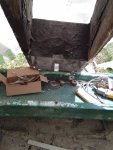
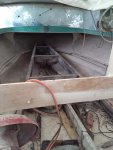
I spent countless hours grinding removing old fiberglass tabs and grounding the hull bottom and sides to prep for the layers of 17oz I was going to put on the bottom strengthen it. If I didn't put 3 layers on the bottom I would have been further than what I am. Here is a shot of me on the verge of removing the stringers.
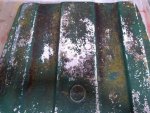
I grounded it down and started reinforcing it from the bottom side by adding 2 layers of 3 oz fiberglass with polyester resin. I ground it down to glass before adding more fiberglass. I personally don't believe in laminating over gelcoat but that's just me.
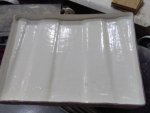
It all looks easy and it's a simple concept just grind til you get to glass wipe clean with acetone and prepare the fiberglass to get it close to your desired dimensions. Then laminate. But there's a lot of grinding to get to this point. I spent a lot of hours grinding. It plain sucks but once you get past that point it's not that bad.
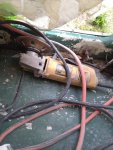
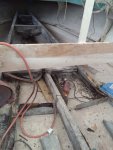
Here some another shot of the stringer as I was removing it. Also the grinder that died. And where I had left on the underside of the stringer to grind.
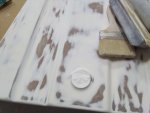
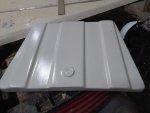
Here is the hull bottom all ground down getting ready to fiberglass. You will also see little wooden blocks which were attached to 2x4s underneath. That was so the hull surface would remain flat. If left no true it can cause your boat to porpoise. Another thing in one spot I went all the way thru or burned through and the bow of the boat was not ground out so I can use it as a reference point for the next cabin sole I put on.


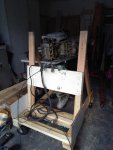
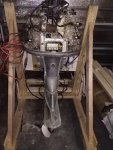
 This is my engine stand I built during the grinding process.


")