1986 Tidecraft Wildfire Restore/ All Rotted

ncnjeremy

Petty Officer 1st Class
Joined
Aug 2, 2011
Messages
260
Re: 1986 Tidecraft Wildfire Restore/ All Rotted

Quote:
Originally Posted by prolinews
"I wouldn't put the other knee walls in, they don't really support anything? Your doing a great job by the way."

Does anyone else have any input on this? I am about ready to finish up and put floor on. And also with the size of ply on the floor and if i need to put anything other than mat on it.
 

ncnjeremy

Petty Officer 1st Class
Joined
Aug 2, 2011
Messages
260
Re: 1986 Tidecraft Wildfire Restore/ All Rotted

Yeah I wasn't planning on giving up. I just saw that post and thought that was very much crap. I mean this site is more for help, questions, and someone else that has interest the same as me. Not a jacka** coming on my thread with a post like that.

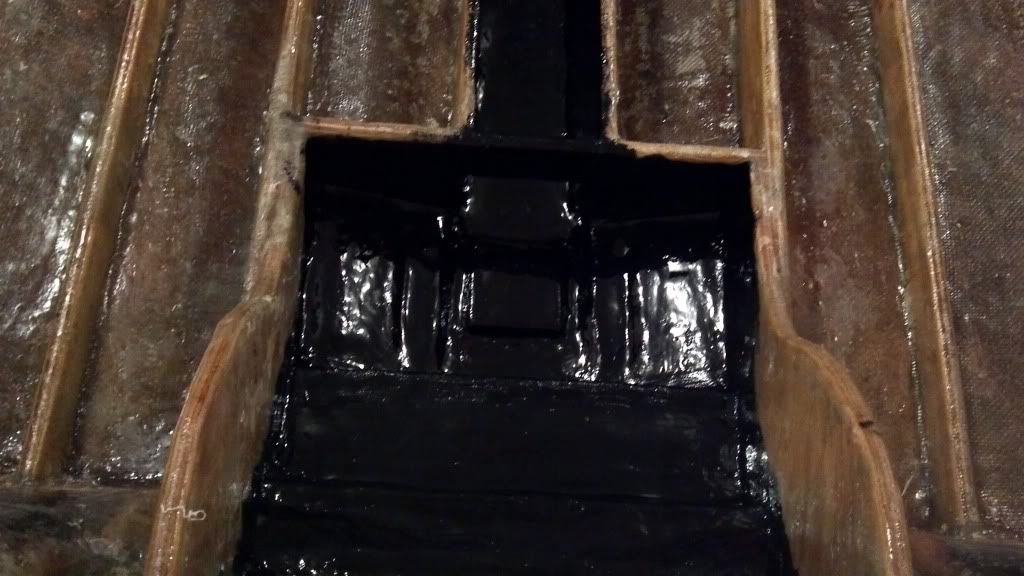
Anyways, it is coming along very well. I need to drill out the 6 holes in the back tonight and recoat them with epoxy. I am gonna use the west epoxy that I have for the areas that are gonna be in contact with lots of water. I have read it is stronger and more water resistent. Im gonna coat the bilge area, and in between the stringers where the water will drain from the floor drain holes. Saved it for last since poly can't be laid over the top of epoxy but the other way round is ok. Boy oh boy there is so much to this. It is fun learning this stuff though.

I saw a boat in a guys backyard with a tarp on it, I took a lil peek... It is an older bass boat with a 85 merc. went up to the door and it was an older man. I asked if it was for sale. (I'm looking for a winter project) He said yes, he would sell it but it wasn't "up for sale". We went out back and pulled the tarp all the way off. It is a 1985 bumblebee. He said he would sell for 2000. It looks really good shape. He said he had bought it brand new in 85. Well, I did a very close inspection on it. I was hoping to find something messed up on it to get it cheap, and for something to fix ..... After i started looking around. The transom looks and sounds very solid. But.... there is a small hole at the very top of the transom where water drains out that comes from the back, near the splashwell. when i tapped around close to it i got a sound like..... (there is rotted wood inside me). Yeah, that sound. So the hold, is about the size of a coke lid. I put my finger inside it and I think it used to have an insert in it, brass or plastic.. whatever it may be. But i could feel wet wood. There is an area about 6 inches around it where wood has gotten wet, and will be rotting. I pointed this out to him and got him to agree to 1000. . In reality it could be filled with CPES and would prob be ok. As small as it is and its not in a area where lots of strength is needed. Well, it is the transom but ya know what I mean. But I told him it would need a whole new transom put in it. Which is not a lie. I do not see why the hole was put there anyways. I would just fill in the hole and drill down and let that lil bit of water just drain into bilge or something. I would never have any holes in transom that are not really really needed. But yeah, Sounds like a good price to me. Might have found something to do after I finish this one. But it won't be half, or a 4th of the amount of work. Gotta get back to work!
 

ncnjeremy

Petty Officer 1st Class
Joined
Aug 2, 2011
Messages
260
Re: 1986 Tidecraft Wildfire Restore/ All Rotted

Originally Posted by FiberglassDust......

"A couple of items, back in the early 80's through early 90's - it was a requirement for anything with 150hp capacity outboard to have 4 knee braces. Not so much a coast guard requirement, but a dealer requirement. As a result, some of the 100hp+ models started getting 'phantom' knee braces to "make it look tough". Sad but true, those outside knee braces are nothing more than 'marketing material'.

As for your questions on the floor -- 1/2 inch AC Fir should do it. before you put it down, make sure to coat both sides with resin as a water deterrent. (you want every inch to be as water proof as possible.) Also, I noticed in an earlier post, you mentioned coating the entire transom/wood with a final coat of resin -- very good idea. One trick you can do, add 1 part black gel coat to 4 parts resin -- this will give your resin a black tint and really clean up that area.

Also -- please make sure to use your woven mat, not just chopped mat when securing your transom and stringers to the hull. You really need that structural integrity that the woven gives you.

As for the guy giving you crap for taking on this project -- don't worry about him. I think you have a very positive approach to this, and probably enjoying it."

This is my first post on this board - I registered specifically to reply to your thread. I understand how much hard work you are putting in on this, and you should feel proud. And, since I am new, I won't post any suggestions of, 'more pics of wifey'... I don't want to be the new perv on the block. But, I am a bit surprised that I haven't seen anyone else make such request.
Thanks for the great advice. I got the stringers all done. And yeah I used the woven and mat. That is crazy they used those for marketing. It makes since now. Cause it just blew my mind that they were tied to the floor only. And that is an awesome idea to mix black gelcoat in with the resin. i did not know that I could do that. Should I mix white in with the resin and put in between the main stringers where the water drains to the bilge? Or black I guess.?? But white would be able to see in the vent holes in the floor and kinda stand out. I really appreciate the input. And I actually have a few really hot pictures of her in the boat. Hell, I have one I might put up... but ill have to edit it a bit. She came out one night in panties and hopped in and grabbed a brush. I hopped right back out and started snapping pictures!!!! hehehe. She is the greatest though!!!
 

ncnjeremy

Petty Officer 1st Class
Joined
Aug 2, 2011
Messages
260
Re: 1986 Tidecraft Wildfire Restore/ All Rotted

That Black Gel Coat really made it look nice. I still got 1 more layer of glass to go over the knees and transom and I'm gonna coat the transom with it also. Im kinda stuck on this foam deal.... If i just pour it it I'm sure its gonna kinda do like a loaf of bread. S i have the option of cutting it and sealing with resin. Or I don't know if i could take a board the size just to cover between one stringer and maybe put saran wrap on it. Then pour the foam in and sit the board on it so when it expands it won't over fill it and it will be flush with the top. I have no clue if it has been or can be done. Trying to read up on it lately. I just am trying to avoid a big mess. That stuff is something else. I did some testing (playing) with it to see how it acts. And to see if it is workable as it expands. ummm... nope. Well, it is until it gets about half way expanded.


2011-10-15_02-31-09_705.jpg
 

ncnjeremy

Petty Officer 1st Class
Joined
Aug 2, 2011
Messages
260
Re: 1986 Tidecraft Wildfire Restore/ All Rotted

So thats where I'm at now..... :) I hope the way i copied this over is ok and I didn't break any iboat forum rules. So... any suggestions? Mainly on the foam process.
 

ezmobee

Supreme Mariner
Joined
Mar 26, 2007
Messages
23,767
Re: 1986 Tidecraft Wildfire Restore/ All Rotted

I'm an aluminum boat guy so I can't offer any useful advice but kudos to you for tearing into this one. It looks like you're doing great work so far. You'll have a stronger (and definitely lighter!) boat when you're done.
 

JDA1975

Lieutenant
Joined
Aug 27, 2011
Messages
1,385
Re: 1986 Tidecraft Wildfire Restore/ All Rotted

I don't see why you couldn't use a board to cover each section separately, but be sure that board has several vent holes, so the air can escape during expansion. However, and I think you would be happier with the results is to pour your foam after your deck is installed. Check out friscoboaters Sea Ray restore and his youtube videos he shows how to pour the foam.

friscos restore:
http://forums.iboats.com/showthread.php?t=454460
 
Last edited:

bartborchardt

Petty Officer 2nd Class
Joined
Mar 15, 2003
Messages
134
Re: 1986 Tidecraft Wildfire Restore/ All Rotted

Saw the first couple of pictures of the transom. OOOOUCH! I have owned 2 Tidecrafts. The first was a Wildfire, never had any problems. I was actually on the Tidecraft Pro Team years ago. Had to travel to the factory to pick up my new boat and meet everyone. The factory caught fire the week I was suppose to pick it up. Lucky for me my boat was in another building. I soon realized they cut a lot of corners. I saw a chop gun and I think they were using it even though they said all boats were hand laid. Needless to say I didn't stay on that team long. Obviously a lack of quality control. I guess that's why they are no longer in business.
 

Cadwelder

Lieutenant Commander
Joined
Aug 30, 2010
Messages
1,780
Re: 1986 Tidecraft Wildfire Restore/ All Rotted

You should pour your foam after the deck is completely installed. Just drill a few 2" or 3" holes in each compartment area and pour it in. Mix small amounts until you're used to the expansion rate. Save the plugs you cut out to glass back over the holes after the foam has set.

If you've never used the pour in foam before here's a few tips. Use the three cup method. One Part A cup, One part B cup and then the C cup for combining them. Use your battery drill with a paint mixer paddle on it and stir the two part mix for about 10 seconds and then pour. It's best to have two people here as it will start to expand very quickly. Just using a stir stick doesn't get a good blend of the two componets quick enough for a good expansion.

You can clean the foam off the mixing paddle with a little acetone. Now on the A & B cups of course can be used over and over, but you'll need a new C cup each time.

CW
 

ncnjeremy

Petty Officer 1st Class
Joined
Aug 2, 2011
Messages
260
Re: 1986 Tidecraft Wildfire Restore/ All Rotted

Thanks for the great ideas. I was thinking of cutting strips of plywood like mentioned above to pour in the foam and then lay the wood on top so it would not overfill and hoping that the expansion would go where i wanted it to go. also sounds like a good idea to cut holes in floor then pour in to the holes. After its done use the holes i cut out and glass them back in. I just hate to cut all those holes in the floor even though it will be glassed back in. Kinda leaves for some possible water intrusion. Lets say I did cut the strips... or even cut the first panel out to fit in. If I poured the foam in and laid down the wood while it was expanding and then pulled it back up to do the next area in between the stringers..... would the foam stick to the wood? Thats why I was kinda thinking of using some siran wrap or some type of plastic on the bottom of the floor. Im gonna check these videos out you posted. Any help is greatly appreciated. Also I had read about not using screws at all just glassing the wood to the floor/foam. Sounded like a good idea. Any Ideas on that?
 

JDA1975

Lieutenant
Joined
Aug 27, 2011
Messages
1,385
Re: 1986 Tidecraft Wildfire Restore/ All Rotted

when i removed my deck, there was actually wood embedded in the foam the bond between the 2 was pretty strong. It does stick to what it is poured against...but I'm sure with a little tug you could remove it, or maybe lay some plastic between the wood and foam and leave the plastic down there.... The board you use will still need 2-3" holes drilled in it, if you leave nowhere for the trapped air to escape during expansion bad things can happen!
 

Cadwelder

Lieutenant Commander
Joined
Aug 30, 2010
Messages
1,780
Re: 1986 Tidecraft Wildfire Restore/ All Rotted

Thanks for the great ideas. I was thinking of cutting strips of plywood like mentioned above to pour in the foam and then lay the wood on top so it would not overfill and hoping that the expansion would go where i wanted it to go. also sounds like a good idea to cut holes in floor then pour in to the holes. After its done use the holes i cut out and glass them back in. I just hate to cut all those holes in the floor even though it will be glassed back in. Kinda leaves for some possible water intrusion. Lets say I did cut the strips... or even cut the first panel out to fit in. If I poured the foam in and laid down the wood while it was expanding and then pulled it back up to do the next area in between the stringers..... would the foam stick to the wood? Thats why I was kinda thinking of using some siran wrap or some type of plastic on the bottom of the floor. Im gonna check these videos out you posted. Any help is greatly appreciated. Also I had read about not using screws at all just glassing the wood to the floor/foam. Sounded like a good idea. Any Ideas on that?

I know what your concerns are, been there done that. If you want to expand the foam first, then I have used a piece of 1/2" thick clear plexiglass and waxed it good so the foam wouldn't stick, it's cool to because you can watch it fill in everything. Now a piece of plexiglass like this is a bit expensive I just already had a piece around. But you can do what you're asking. Personally I don't think it's worth the trouble, I just install the deck, drill the holes and pour it in now. Up to you though.

On the attaching the deck part. I use screws. I've seen staples, screws and nothing from the factory. Again, your choice, but I perfer to screw it down. You'll glass over the screw heads so it'll be sealed.

CW
 

ncnjeremy

Petty Officer 1st Class
Joined
Aug 2, 2011
Messages
260
Re: 1986 Tidecraft Wildfire Restore/ All Rotted

A couple things..... when you say waxed.... do you mean like car wax? i was thinking of like a bit of crisco or something like that. Vegetable oil. Just a lil bit to keep it from sticking. Also did you pour the foam in, then quickly lay the plexiglass in between the stringers and just hold it down?
 

Woodonglass

Supreme Mariner
Joined
Dec 29, 2009
Messages
25,929
Re: 1986 Tidecraft Wildfire Restore/ All Rotted

A couple things..... when you say waxed.... do you mean like car wax? i was thinking of like a bit of crisco or something like that. Vegetable oil. Just a lil bit to keep it from sticking. Also did you pour the foam in, then quickly lay the plexiglass in between the stringers and just hold it down?

You won't have time! When it starts to expand it goes quick. Staple some plastic to your plywood. Foam won't stick to it. Screw the wood down. Pour the foam. Unscrew and remove. Repeat. Personally, I wouldn't worry about it. I'd install my deck, With screws but predrill the holes and coat them and the screws with resin when installing. I would then cut 3" holes and pour my foam. Just like this guy did....

http://www.youtube.com/user/FriscoJarretts?blend=4&ob=5#p/u/41/gyGBC9Z0g_o
 

Cadwelder

Lieutenant Commander
Joined
Aug 30, 2010
Messages
1,780
Re: 1986 Tidecraft Wildfire Restore/ All Rotted

A couple things..... when you say waxed.... do you mean like car wax? i was thinking of like a bit of crisco or something like that. Vegetable oil. Just a lil bit to keep it from sticking. Also did you pour the foam in, then quickly lay the plexiglass in between the stringers and just hold it down?

Yes car wax, just somthing to keep it from sticking. Now you still have to pour thru holes in the plexiglass. You won't have time to pour the quickly lay the plex over it. But like I said early, I done that just for curiousity to watch the foam mostly. I always just drill holes in the deck (after install) and pour the foam, use the plug to patch the hole and glass over them.

Or like Woody just said, cover your plywood with plastic and do it that way. Its really not a big deal....everyone (most everyone) pours after the deck is complete..

CW
 

Woodonglass

Supreme Mariner
Joined
Dec 29, 2009
Messages
25,929
Re: 1986 Tidecraft Wildfire Restore/ All Rotted

Yep, ^^^, I only know of 1 iBoater in recent memory that did NOT pour after the deck was in, and he regretted it. Just out of curiosity, why are you wanting to pour it without the deck in place. If you are worried about it NOT filling the space... don't I will find all the cracks and crevices. If you're worried about moisture, and water getting back under there, guess what, it Will. nothing you can do about it except do the best you can to seal everything up and maintain her as best you can, but even then it probably will.
 

ncnjeremy

Petty Officer 1st Class
Joined
Aug 2, 2011
Messages
260
Re: 1986 Tidecraft Wildfire Restore/ All Rotted

OK... I kinda get it now... too much of a pain in the ars to pour that way. So I cut the 3 deck boards yesterday. I'm just gonna cut the holes and pout in. Does the holes need to be cut at an angle so it will sit back in properly (without falling thru) or since the foam will fill it up I am thinking it'll be OK just to use a door hole type saw. About how far apart should I drill the 3" holes? I know I am probably overthinking this all but I have done the entire boat this way!! Lol.. I'm just trying to cover all basis. I'm gonna pour some foam finally when I get off work. Also.... I went to get screws and could not find stainless deck screws. I got composite deck screws.. lifetime warranty against rust. They have like different color... like tan, brown, light brown. But there were expensive. And they have a square head with bit included. I think they will work great. What do y'all think?
 

Woodonglass

Supreme Mariner
Joined
Dec 29, 2009
Messages
25,929
Re: 1986 Tidecraft Wildfire Restore/ All Rotted

Screws will be fine, just make sure to predrill your holes, and coat them and the screws with either resin or 3m 4200 sealant. Did you not watch the video of Frisco Boater installing his foam? If not, you should. It shows and tells you exactly how to do it. You'll need to mix up some PB to replace the hole plugs in the deck.
 

ncnjeremy

Petty Officer 1st Class
Joined
Aug 2, 2011
Messages
260
Re: 1986 Tidecraft Wildfire Restore/ All Rotted

Wow...!! That was a really good video! The only thing with my boat I have 6 stringers with cross braces so I need a lot more holes drilled. I started drilling them last night. I wanted to drill them out before I screwed the deck down. For one reason like the video I would see myself dropping several of the holes and not be able to get em out!!! Like in bow on video!! I'm gonna put my camcorder together and make a video on it also!!! It looks fun!!!!!! I'm finishing up at work now. Gonna get home and drill the rest of the holes and c if I can mix a couple of batches. I got some mixing paddles that hook to my drill. That seems like it would be much easier and would mix better. I just hope I can get the goo off the paddle each time!!! Sooooo.... I'm in for a fun night!!
 

ncnjeremy

Petty Officer 1st Class
Joined
Aug 2, 2011
Messages
260
Re: 1986 Tidecraft Wildfire Restore/ All Rotted

Sooooo... I got the deck on and the foam poured. Finished it up laaaaate saturday night, talking 5 am sunday morning. I started at around 9 and finished at 5. All the foam is poured. It went a little different then I expected. I had played with mixing a couple small batched a few months back. It was like 85-90 outside then. Saturday it got down to bout 45. somewhere low 40's. So the first batch I was like rushing big time to get it all poured. It expanded lots slower!!!! which was actually nice. I would suggest if anyone wanting to pour this foam to turn on the A/C or do it when its cold outside. I actually turned the heat on a bit in there to speed it up a bit. I mean I'm talking a 7 minute long time period after poured to fully expand. After I heated it up in there it went down to about 3-4 minutes. It worked out great. I actually recorded the entire process. Well, not the entire thing but the important parts. Im gonna check out the video and shorten it up a bit and edit it, then ill post a link up to it. Thank you all for the help with this!!! Next step will be sand down the deck with belt sander and put the pucks i drilled out back in. Then lay chopped strand over the whole deck and attach to the sides of the hull. Then i can put the cap back on. BUT!!! wait for it.... wait for it..... When I was pouring the LAST hole on the boat, I went to get out of the boat (note that its 5 AM and I'm extremely tired but very motivated to finish the deck..) my leg got caught on the side of the boat, and the hull was still jacked up in the front. I flipped out and landed on my left palm sideways and my head. So I have a severely sprained wrist and a fracture on my thumb. Oh, and a darn headache!!! So yeah... a hand all wrapped up (refused the cast) with splint and a bit of time off work. Im trying to figure out if I can sand the deck down with one hand. But anyways, Ill be at home playin on the computer and reading some more threads. Wish me a quick recovery. Ouch it hurts to type..... chicken peckin!!!!! :facepalm:
 
Top