1995 Crownline 202BR Restore

beta

Cadet
Joined
Sep 16, 2023
Messages
8
I came into possession of this boat 2 years ago. It had a spongy deck in several spots but the engine ran well. After some TLC on the stern drive, I was able to use it for a summer without major issues.

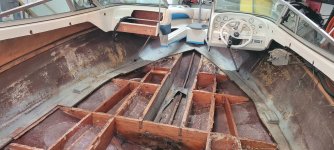
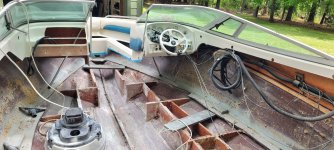
I knew the spongy deck was a ticking time bomb so decided to bite the bullet and start ripping stuff out to see how bad it was. No surprise, there was extensive rot in the bilge area and around the ski locker. After reading through many, many post here on this forum I decided to take on the restore project.

At this point, I've removed all the rot, including the transom, and now grinding away. Huge shout out to @Rickmerrill and @Badfish95 for their work on same/similar boats and the detailed postings in the forum. I never would have got this far without them.

I'll post some photos shortly.
 

beta

Cadet
Joined
Sep 16, 2023
Messages
8
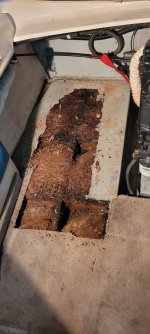
Initial exploration....
20240224_140350.jpg

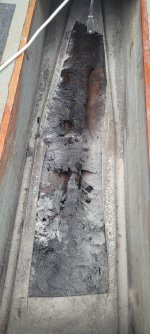
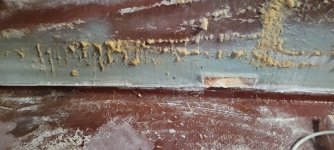
Ski locker floor... it was like ash.
20240303_165833.jpg

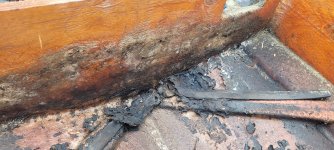
Between bilge and gas tank
20240303_131456.jpg

I ended up cutting out the fiberglass section in the front so I could get to the decking below.
20240825_112117.jpg

20240825_164215.jpg

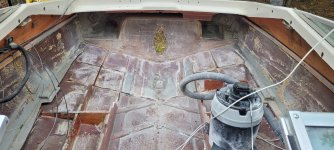
Current status
20250419_113353.jpg

20250419_113418.jpg


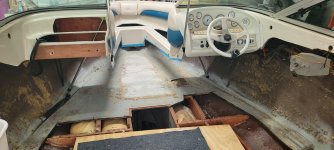
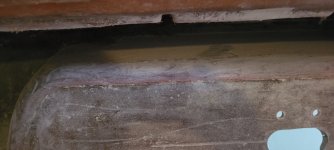
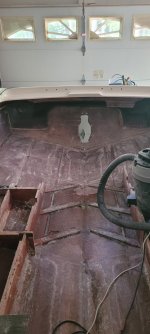
I'm currently grinding away on the fiberglass. It seems the main water issue was in the bilge area and it was not pumping out. As a result, the water was collecting and going up the center of the boat, under the fuel tank and ski locker. As a result, everything down the center line was rotted. The stringers up the side are fine so I'm not taking them out.
 

airshot

Vice Admiral
Joined
Jul 22, 2008
Messages
5,419
Yeck.....got me itching just looking at your pics.....good luck and keep us posted. Hope your using a good respirator !! Fiberglass dust is toxic to your lungs !!
 

beta

Cadet
Joined
Sep 16, 2023
Messages
8
Yep, Tyvek suit and a full face 3M respirator. It's a sweat factory but works!
 

bajaman123

Seaman
Joined
May 6, 2009
Messages
65
Nice work! I've helped with a few projects like this over the years...it is NEVER fun. You're fortunate that the engine stringers and transom are sound.

Good luck!
 

beta

Cadet
Joined
Sep 16, 2023
Messages
8
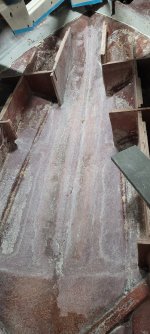
Question... I have this "stringer" running along the keel starting from the ski locker to nearly the bow. I've seen other similar boats that don't appear to have this. The floor of the ski locker was resting on top of this "stringer" but the front part was just there by itself. Is this a structural thing to strengthen the hull? Reason I'm asking is the back half is rotted out where the ski locker was and I'm wondering if I need to replace it or just remove it. It was there to start with so my default answer is to replace it but I'm wondering if that is really necessary.

20250420_140651.jpg

20250420_140721.jpg
 

beta

Cadet
Joined
Sep 16, 2023
Messages
8
More progress... Removed the rotted piece running along the bottom (which I will replace) and cut out the lip of decking. Still need to finishing grinding some of the bottom to make sure I have a good surface for the new glass. Then will grind out the deck lip and sides.

20250504_103706.jpg

20250504_103732.jpg
 

tpenfield

Moderator
Staff member
Joined
Jul 18, 2011
Messages
18,166
Following . . .

The more forward sections of the boat looked OK. Usually the mushy stuff starts from the stern.
 

Pmt133

Senior Chief Petty Officer
Joined
Jan 6, 2022
Messages
753
Safest bet is put it back as it was only better. Mine had a "keel stringer" but it really was only under the fuel tank and I assume for support of the weight. (Triangle for strength) I extended it a foot or so in either direction because my fuel tank was larger and I figured it would tie in the areas outside the bulk heads.

It looks it was only done with chop strand on yours (hard to tell) so it may not be providing the same structure that you would get by using a traditional layup like your main stringers are.

Keep up the good work sir.
 

Lou C

Supreme Mariner
Joined
Nov 10, 2002
Messages
13,064
I'm sure you'll wind up with a far better boat than you started with! That is the main reason to do one of these jobs, unfortunately for me I'm past the age where I'd even consider it. So when this boat is too far gone to justify fixing, it's going to be new or nothing.
 

cyclops222

Commander
Joined
Mar 21, 2024
Messages
2,043
Definitely a structural piece. To prevent the bottom hull from flexing in rough water or sitting on a trailer. Or even a couple of boat stands. Do it. It is the keel of the boat.
 

beta

Cadet
Joined
Sep 16, 2023
Messages
8
Saturday is grinding day so more progress today. Finished with 95% of the floor. Just a few places that I couldn't see when it was covered in dust. Also got the deck lip ground away and up the sidewall. Ground down around the transom lip well. At the top of the transom, I can only get a few inches ground due to the interference of the top cap. Any suggestions on how grind with only a few inches of clearance?

Top of transom. About 3.5" off clearance on the top surface.
20250510_155313.jpg

Side of transom
20250510_155309.jpg

Deck lip and sidewall.
20250510_155326.jpg
 

beta

Cadet
Joined
Sep 16, 2023
Messages
8
Question about the sidewall. The original setup for this boat had a layer of spongy foam glued to the sidewalls which were covered by a sheet of vinyl which was stapled to a wooden piece that went along the side of the boat just about where the top cap attaches to the hull (out of site with the side piece installed). The vinyl was attracting mold which seems inevitable in a boat environment. I'm thinking about putting something like deck foam on the sides instead. I was thinking about just smoothing the walls and doing a gel coat but I'd prefer to have the foam to help with sound dampening. So my question is.... is deck foam (i.e. Seadek) actually waterproof? or will it absorb moisture and therefore, end up with a mold problem. The issue is once the side pieces are install in the boat, there is limited access to these areas so cleaning them is a problem. I really want something that can just be wiped down without worrying about mold getting starting in some hidden areas.
 

MikeSchinlaub

Petty Officer 1st Class
Joined
Jan 14, 2025
Messages
208
I recently did a transom job with a clearence issue like that. My supervisor has an extended shaft straight die grinder that helped a lot, along with a few carbide bits and a stone ball. Later, I had closed the gap even more with glass, and had to come up with something else. I taped a stir stick to a sawzall blade, and cut a piece of psa 36 grit sand paper to fit it. It was a bit slow, but worked well. Longer blades will let you put some pressure on and flex them.

As for the sidewalls, just gel would probably be best. If you use the foam, could you set up a blower on a timer somehow to dry it out? Even just a tiny box fan left in overnight would work.
 
Top