DIY reupholstering of boat seats/captain's chairs

Woodonglass

Supreme Mariner
Joined
Dec 29, 2009
Messages
25,929
Even if you use Photobucket you'll get errors but...Wait 30 to 60 secs and then refresh the page, (I know...What a freakin Hassle but...) it'll work and your pics will post!!!:facepalm:
 

natemoore

Master Chief Petty Officer
Joined
Jun 13, 2009
Messages
844
Using the same techniques I learned while doing the captains chairs, over the weekend I reupholstered the rear seat backs, seats, and the rear seat top. The only tricky thing was doing the seats. I tried two different sewing steps, but on each seat, I either had to pull out the seam ripper or do some hand stitching. There was just too much welting at one of those intersections to fit through my machine.

On the port side topper, I will pull out the staples and line up the welting better, but otherwise, I'm very happy with the results.


Last edited:

natemoore

Master Chief Petty Officer
Joined
Jun 13, 2009
Messages
844
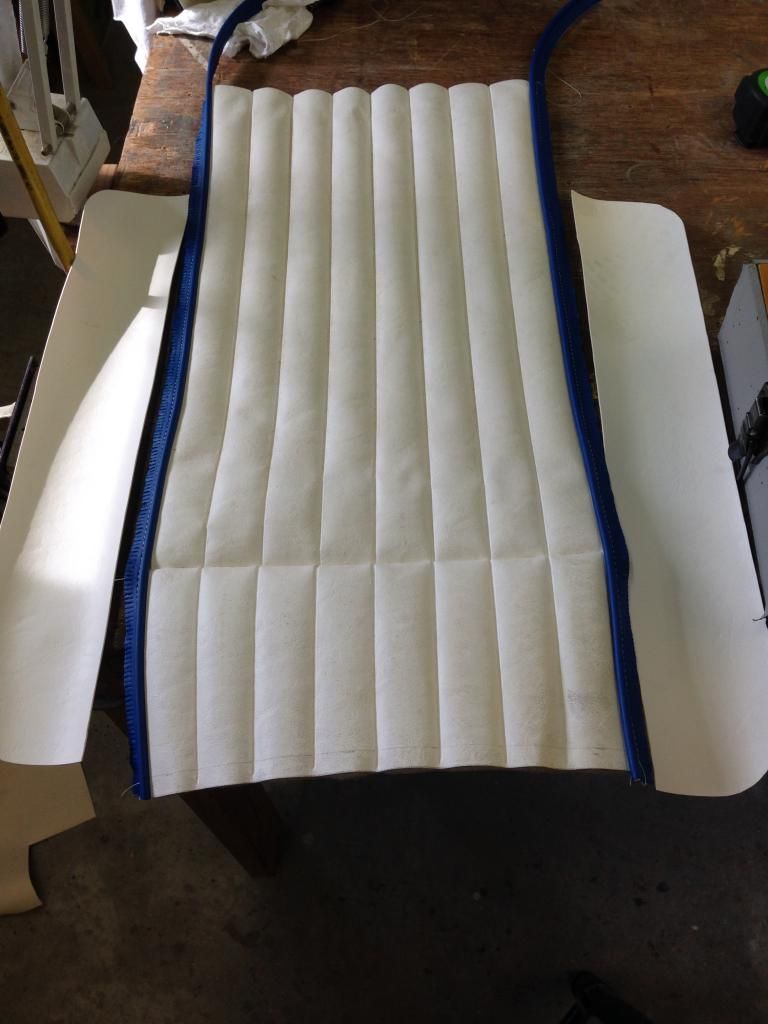
Here are the components of the seat. There's the pleated center section, the two pieces on each side of the center, then a band of royal blue going around the sides. The back of the seat is in the foreground.


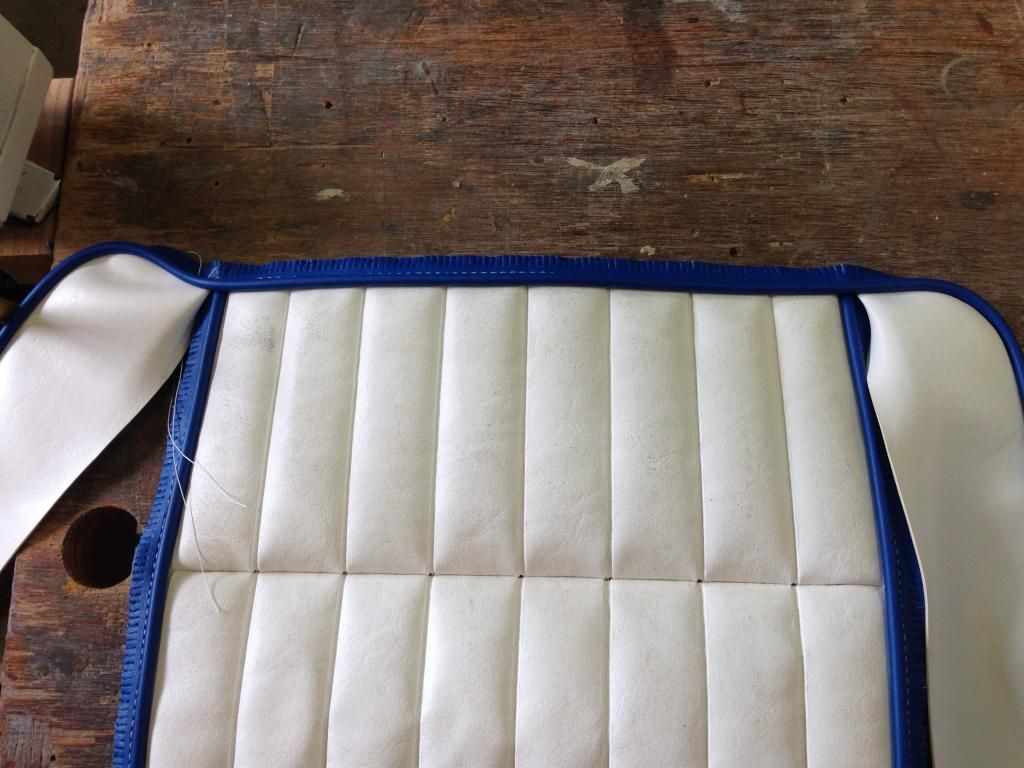
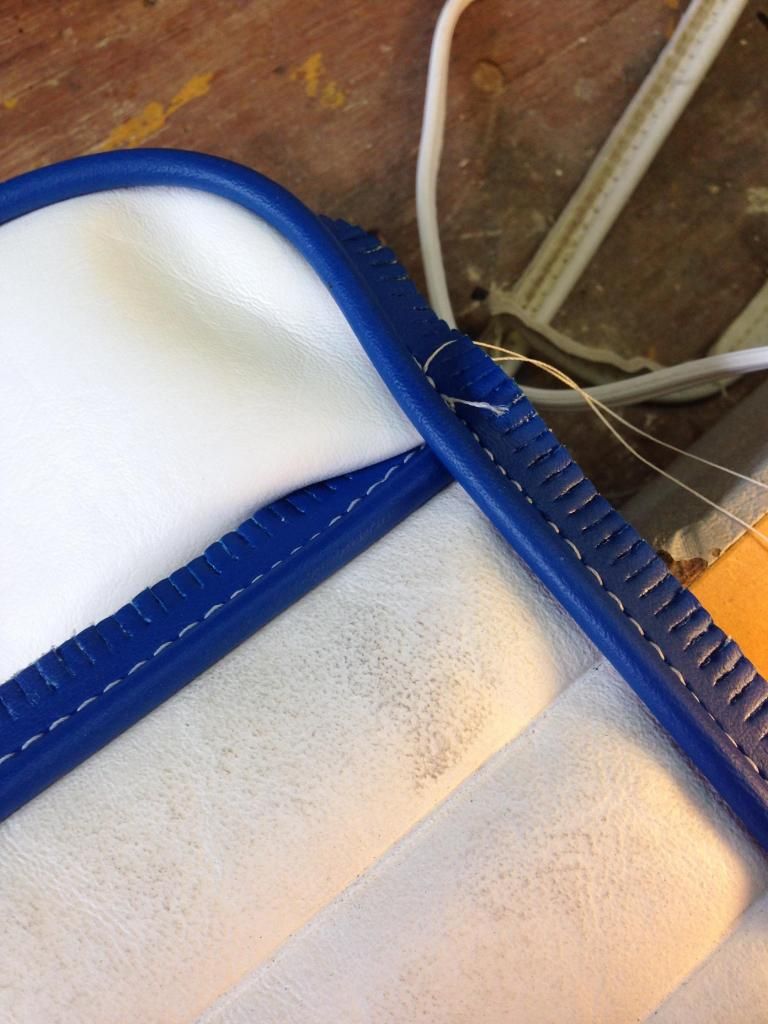
The first time around, I sewed the center section to the left and right top pieces, then sewed the side to that assembly. When I got to the front, I realized that I had to use the seam ripper so I could get the side welting under the welting attached to the center pleated section. After ripping, tucking, and resewing, it looked great.

But I thought I just had the order wrong, so on the next seat, I sewed two the side to the left and right seat uppers, then sewed the left/right seat uppers to the center section. This is where I had to hand stitch. The first procedure yielded better results, but both look fine.


I think if you actually rehearse the sewing, instead of staring at it, coming up with a gameplan in the depths of your brain, then hitting the machine, you would arrive at the most logical way to sew it up.
 

natemoore

Master Chief Petty Officer
Joined
Jun 13, 2009
Messages
844
Now, to the side panel. The trick is figuring out the order in which they originally stapled it by disassembling it, then reinstalling in the original order.


natemoore

Master Chief Petty Officer
Joined
Jun 13, 2009
Messages
844
Just thing LIFO...last in, first out. The last thing to get stapled in this side panel was the upper portion in white. Remove staples. Take lots of pictures. Label everything. Make reference marks and take notes.


natemoore

Master Chief Petty Officer
Joined
Jun 13, 2009
Messages
844
There was a 3/4" stip of plywood at the top that I had to remove. But that's now set aside, along with the vinyl.


natemoore

Master Chief Petty Officer
Joined
Jun 13, 2009
Messages
844
The next to last panel that was installed was the white lower one. I used a putty knife to get the foam away from the plywood, and I also discovered some wood rot. I'll show you how to easily repair that later.


natemoore

Master Chief Petty Officer
Joined
Jun 13, 2009
Messages
844
The center white panels come off next.


Take lots of pictures of all the little details. It'll help you in the reassembly.


natemoore

Master Chief Petty Officer
Joined
Jun 13, 2009
Messages
844
This foam can stay in place, but I had to remove the corresponding aft foam in order to repair the rot.


There is some kind of resin impregnated cardboard here. What's this stuff called?


natemoore

Master Chief Petty Officer
Joined
Jun 13, 2009
Messages
844
The center white pieces are removed, labeled, and set aside. Next to come off is the upper, forward-most blue section.


Remove these sections from front to back and remember than you'll reinstall them from back to front.

Before you remove the foam, draw lines on the plywood so you can get them back in the right place. Once removed from the plywood, the foam will shrink, so you'll need lines on both sides to reglue it correctly.


natemoore

Master Chief Petty Officer
Joined
Jun 13, 2009
Messages
844
Take note of how each piece is stapled over the last piece. Looks pretty easy to me.


natemoore

Master Chief Petty Officer
Joined
Jun 13, 2009
Messages
844
All the vinyl and foam is off the plywood. Time to repair the rotten wood. After staring at it for 20 or 30 minutes, drawing on my lifetime of woodworking experience, I decided that the quickest and easiest way to to this is to tack a piece of 1/2" plywood underneath the area to be cut out, use a jigsaw to cut through both original and new plywood at the same time, then use biscuit joinery to put it back together.


natemoore

Master Chief Petty Officer
Joined
Jun 13, 2009
Messages
844
The width of the jigsaw blade is negligable as this glued up very tightly as you will see later.


natemoore

Master Chief Petty Officer
Joined
Jun 13, 2009
Messages
844
My plate jointer wouldn't fit with all the curves, so I used a slotter bit and router. I had to do two passes to get the slot to match the thickness of the #10 biscuits.


Lots of Franklin Titebond waterproof wood glue.


Clamped up to dry.


sphelps

Supreme Mariner
Joined
Nov 16, 2011
Messages
11,475
Outstanding work ! One of these days I'm gunna try and do some pleats .
 
Top