Formula 27PC Complete Power plant rebuild

Tail_Gunner

Admiral
Joined
Jan 13, 2006
Messages
6,237
Your almost home..easy on the beer... thing's are not that bad someone just totaled out my tow rig i mean blam. For the first time in 30 yrs we had a heat wave hear in Portland it's fleet week the water's great and i don't have a tow rig......Now that will bunch up the short's a bit if ya know what i mean..:facepalm:
 

alldodge

Moderator
Staff member
Joined
Mar 8, 2009
Messages
42,894
Nice water and what a bummer with no tow rig

Took the elbows in this AM and they are going to shorten them up 8 inches. This will give my 14 inches to use a hose to connect to the tips. I ordered some Flex hose (flex that's a joke) and hope I can make it work. If all else fails again, I'll take the pipe which was cut off and use it with the hump boots.

Sure hope I can get it in the water before fall

Cycled the key on/off and heard the fuel pump turn on. Did it a few more times and think the fuel rail could be primed now. With the fuel gauge not could be a larger problem. Turned the key on and left it that way for a bit, mean while I unplugged the lube bottle and connected them together. No alarm from that nor the oil pressure switch. The battery gauge does come up so that's working. Need to dig further into the wiring.
 

tpenfield

Moderator
Staff member
Joined
Jul 18, 2011
Messages
18,282
I figured that you would need to cut the pipes . . . maybe pre-heating the 'flex' hose a bit before installation may help.
 

alldodge

Moderator
Staff member
Joined
Mar 8, 2009
Messages
42,894
Got the fuel gauge working, and I think my alarm system should be OK. Keep forgetting I don't have a MEFI-1 system anymore, have a MEFI-3, all warning faults go to the computer now. the computer causes the ground to sound the alarm. Engine needs to be running first.

Got the trim gauge to start to move, but still will not stop trimming up. Need to get some help to work in both locations.
 

alldodge

Moderator
Staff member
Joined
Mar 8, 2009
Messages
42,894
More good news, NOT, talked Eddie and he says I need the length to keep reversion down. So I called and stopped the guy from working on the exhaust. I'm going in Monday to see if he can make me a tube to fit what I have (doubt it) or I'll be cutting the holes so it will come straight out. If I do that I'll probably have to go up 2 inches, and with that might need to add length to my turndowns. Sure looking like it might be getting cold before the boat gets wet

:cold: :mad-new: :grumpy:
 

Tail_Gunner

Admiral
Joined
Jan 13, 2006
Messages
6,237
Could you post a pic of the whole setup..that turn is to much you may have to install spacers in your riser's to get a shot looking down at your tip's
 

alldodge

Moderator
Staff member
Joined
Mar 8, 2009
Messages
42,894
See post 118 and 119, it defines what I have been dealing with
 

tpenfield

Moderator
Staff member
Joined
Jul 18, 2011
Messages
18,282
More good news, NOT, talked Eddie and he says I need the length to keep reversion down. So I called and stopped the guy from working on the exhaust. I'm going in Monday to see if he can make me a tube to fit what I have (doubt it) or I'll be cutting the holes so it will come straight out. If I do that I'll probably have to go up 2 inches, and with that might need to add length to my turndowns. Sure looking like it might be getting cold before the boat gets wet

:cold: :mad-new: :grumpy:

Hey AD - I have not read all of the posts in this thread thoroughly, so my apologies if certain things have been covered, but I want to see if I have a good understanding of the situation. . . .

- The holes in the transom do not line up perfectly with the new exhaust elbows

- The new exhaust elbows run closer to the transom than the previous elbows, giving less freedom for a flex hose.

- The old elbows had enough distance between the elbow tip and the transom, so that the standard exhaust hose could accommodate the slight mis-alignment of the holes in the transom.

- The new elbows have a greater distance where the water and the exhaust travel separately and mix further away from the exhaust manifold. This is needed because the increased HP of the engine came, in part, due to a higher overlapped cam setup and the possibility of reversion exists with this setup.

Is all of this correct for the most part? If so, I would think your best approach may be to make new holes in the transom that line up perfectly with the new elbows. This would be a bit tricky, since the new holes would cover about 80% of the area of the previous holes, but you could probably make a 'patch segment' of the previous holes. . . . or patch the existing holes entirely and drill new ones in the exact location that is needed.

Just my thoughts, but I wanted to share.
 
Last edited:

alldodge

Moderator
Staff member
Joined
Mar 8, 2009
Messages
42,894
Yes your correct. The previous setup had standard rise elbows and were short. I would then connect you silent choice diverts, then connect them to the tips. The new elbows are 3 inch higher and quite a bit longer.

The current plan is I'll line up where the new holes will need to be. They will be offset to about 2 inches. I'll take a drill a 4 inch hole in a piece of 3/4 plywood. Mount the plywood hole over part of the existing hole. Hopefully this will work out. Take the piece cut out and glass and glue it into the bottom of the hole and remount tips.

The tip angle is about 12 degrees different then the elbow. I'll need to decide if
fetch


fetch


Another issue I'll have to figure out is there is not a lot more room to go up. While the hole is about 2 inches lower I might need to go up 3 inches to offset the difference in angles.
 

tpenfield

Moderator
Staff member
Joined
Jul 18, 2011
Messages
18,282
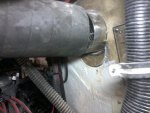
The only other thought I had was if the machine shop could mill the mating surface of the elbow at a slight angle (versus how it is now), then you might get another degree or two if incline and clear the wiring harness (shown in the picture) a bit better.

I guess engine re-fitting is not an easy task . . .

I am watching with great interest though, as I plan on doing a thru-hull exhaust mod next year . . . :)
 
Last edited:

alldodge

Moderator
Staff member
Joined
Mar 8, 2009
Messages
42,894
I am watching with great interest though, as I plan on doing a thru-hull exhaust mod next year . . . :)

Doing the initial hole wasn't that hard, even eye balling it. It all went together because of the distance. If you stiff with standard elbows you will put yours in about the same position. My issue is the 3 inch higher issue which is causing me the trouble.

Plan to talk to the welder Monday and show him what I currently have and see if he has anything that will work other then cutting new holes
 

Scott Danforth

Grumpy Vintage Moderator still playing with boats
Staff member
Joined
Jul 23, 2011
Messages
50,612
Have your welding guy make some S-shaped transitional pieces
 

alldodge

Moderator
Staff member
Joined
Mar 8, 2009
Messages
42,894
I'll ask the question but there isn't much room to work with. With only 6 inches there isn't much and still have room for a 4 1/4 straight boot or 5 1/4 hump boot. The guy is good enough to make the whole pipe make an S bend, just have to wait and see what he says
 

alldodge

Moderator
Staff member
Joined
Mar 8, 2009
Messages
42,894
I picked the elbows back up and going to re-install tomorrow. My plan is to put a steel straight edge in side the pipe and bring it out the existing hole. Measure from it up to top of pipe and transfer that to the outer transom. Will measure several points until I figure the inside of the pipe then add the distance for the outer circumference. Then take a piece of 3/4 plywood which I have already cut a 4 inch hole and screw that to the transom. Then cut the half moon out. Once out I'll rotate it and epoxy it back on the opposite side.

Could use the outside of the pipe but it does not give me the same amount of space to work with through the existing holes.

Other issues to decide before I start cutting is, the angle of the pipe is different then the tip. There is 12 to 15 degrees difference. I could split the difference and cut a bit higher, this would cause a smoother arch when trying to install the hose. I will have to use hose because the larges boot I have is 5 1/4 long and the space is 6 to 6 1/2 inches currently, will be a bit less once holes are moved

The other issue I have is the transom is 2 1/4 thick, my holes saw is 1 7/8, so I'll need to cut from both sides, unless something like my jig saw will finish the cut
 

alldodge

Moderator
Staff member
Joined
Mar 8, 2009
Messages
42,894
Going to pickup a holes saw from the welder, he took two of them and put them together so I will have enough to go clear through from one side. Spent quite a bit of time trying to figure out where to cut. I did find out that the pipes or manifolds are slightly different. Don't know if it's top of the milled surface of the manifold or the pipes but on comes down about 1/4 inch below the other. Swapped them back and forth a few times to make sure.

Did notice when I was aligning the engine, the port side is almost clear to the top and the starboard is about 1/2 inch down from the top. It was close to that originally so it came that way.

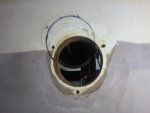
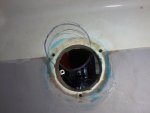
Decided to find center of the pipes and how they would come out if it was solid thru, then change the angle where the tips will enter at a 15 degree difference. The dark mark is where I plan to cut. Also raised them about a 1/4 inch due to less angle.

Port side
Photo647.jpg

Starboard side
Photo646.jpg
 

tpenfield

Moderator
Staff member
Joined
Jul 18, 2011
Messages
18,282
Looks like the holes are off by the same approximate "X & Y" coordinates (i.e. low and to starboard) . . . . which seems strange to me for both to be like that.

I am wondering if the original holes were not centered on the center line of the transom or if the re-installation of the engine/transom assembly is aligning differently than the original engine :noidea:
 

alldodge

Moderator
Staff member
Joined
Mar 8, 2009
Messages
42,894
Looks like the holes are off by the same approximate "X & Y" coordinates (i.e. low and to starboard) . . . . which seems strange to me for both to be like that.

I am wondering if the original holes were not centered on the center line of the transom or if the re-installation of the engine/transom assembly is aligning differently than the original engine :noidea:

There pretty close to being off the same but the starboard side was a bit more. As before I drilled the original holes by eye balling it and the starboard side is harder to get to from the inside.

As I remember, found approximate center and drilled as far as I could fro the inside. Then went from the outside and finished. There was some issues connecting but nothing like current due to all pipe until 6 inches from the transom. With using boots up close to the engine and then again at the transom, gave me a bunch of room to move around.

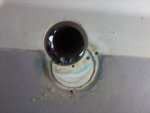
Have drilled the holes and I'm pleased how they came out. Having a saw which can be used clear through is a big plus. Also being able to measure where the holes should be moved is also a good thing. Need to clean the silicone off the old hole and get it ready for epoxy and glass. Will post more pics later
 

tpenfield

Moderator
Staff member
Joined
Jul 18, 2011
Messages
18,282
I guess what I am saying is if the new port side pipe wants to be upward and to port of the existing hole (which is does), I'd expect the starboard pipe to would want to be upward and to starboard of the existing hole (which it is not). Therefore the offsets are similar, but not symetetrical.

Just wondering if that is an issue from the past installation or the current one. I am sure you will get it all sorted out though.
 

alldodge

Moderator
Staff member
Joined
Mar 8, 2009
Messages
42,894
I would say it is do to my error in the initial install of the exhaust tips.

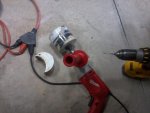
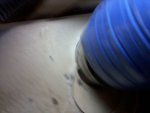
Put plywood plate over the hole and drilled thru


Tools and piece that came out

Photo649.jpg

Port inside with half moon in place. Came out pretty good

Photo650.jpg

Starboard side
Photo651.jpg

Starboard inside
Photo652.jpg
 
Top