Mercruiser 140 3.0 Makeover

Rick Stephens

Admiral
Joined
Aug 13, 2013
Messages
6,118
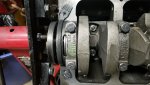
Does perfect seal go here where the blue painters tape is? If yes, does that interfere with the main bearing cap torque spec?

rick i know you answered this i just wanna make sure i understood you right

yes

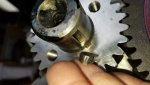
should i install the main seal like this so the connecting edges are hidden?

I've never rolled them. Probably wouldn't matter either way tho.
 

Rick Stephens

Admiral
Joined
Aug 13, 2013
Messages
6,118
does perfect seal go in between where the upper and lower seals meet? (where the blue tape is)

Yes. Not much.

anything on the inside of rear main seal? oil? rtv? perfect seal?

Nothing is fine

anything on the outside of the rear main seal? oil? rtv? perfect seal?

again rick i think you answered this already but im just making sure i understand correctly, sometimes without a pic i get a lil confused with the orientations of the seal

thin, very thin, RTV
 

Rick Stephens

Admiral
Joined
Aug 13, 2013
Messages
6,118
theres some heavy rust on the block near the water pump, im scared to use any kind of wire brush... any advise for getting it clean? so far ive used razor blades, gasket scraper and a plastic gasket remover drill attachment, the yellow one. maybe i just need more patience....


You aren't going to hurt that with a wire brush.
 

fishrdan

Admiral
Joined
Jan 25, 2008
Messages
6,989
I install the rear main seal offset as you showed in the pics. Also put some oil on the seal surface so it doesn't run dry on the crank (DON'T put oil by the ends of the seal, where the RTV goes).

The 3M weatherstrip adhesive I mentioned for keeping the pan gasket in place, do the same thing and glue the valve cover gasket to the valve cover, before installing it, to keep it from slipping.

I wouldn't worry about the rust by the water pump, until you get the pan and timing cover installed. Cleanliness is next to Godliness when working on the inside of an engine, and you don't want debris from cleaning off the engine, to get inside.

I didn't mention this earlier, and kind of late now, but I bag the engine while not working on it, to keep dust out.
 

Goldie627

Lieutenant Junior Grade
Joined
Oct 28, 2013
Messages
1,010
Thanks guys, lots of good info, I appreciate all the advise. Today went well, i installed the camshaft (got it all lubed). After that I installed the crankshaft dry to check bearing clearances. I used the green plastic gauge and I was .002 for all rod and main bearings. Service spec for rods and mains is no more than .004 so im good. Next step is to take the crank back out and lube everything up. Im thinking about removing the oil pump because its in the way, i think it is making it harder than it has to be to get the crank in and out. If i remove the oil pump can i just bolt it back up after crankshaft installation? or should i just leave the oil pump alone?

20180107_155543.jpg

20180107_124702.jpg
 

Scott Danforth

Grumpy Vintage Moderator still playing with boats
Staff member
Joined
Jul 23, 2011
Messages
50,479
Thanks guys, lots of options to think about

scott.... was that urethane a high temp BC CC? Or the same type of auto paint youd normaly use?

And also, I was thinking of leaving as much of the original paint as I could, and only primering where i take it down to bare metal durimg the rust removal process, motor is not that bad but does have some spots that need attention

the parts of the motor that is not bare metal I can scotch brite till dull

is my plan ok? Or should i primer the whole engine?

Rustoleum or tractor paint as a 2-part. Rattle cans of engine enamel for the engine
 

Rick Stephens

Admiral
Joined
Aug 13, 2013
Messages
6,118
Coming together beautifully. I can't disagree with fishrdan, rotating the seal a bit can't hurt anything. Been a bunch of years since I did a 2 piece rear main.

Oh, and pull the dang water pump. Makes it too easy to mar a journal or a bearing with it in the way.
 

Goldie627

Lieutenant Junior Grade
Joined
Oct 28, 2013
Messages
1,010
Thanks Rick, I pulled the oil pump, that made crankshaft removal/installation waaaay easier. :joyous:

I pulled the crankshaft, lubed all the bearings, installed the rear main seal and installed all the caps. Mains were torqued to 65 ft-lbs, rods were torqued to 40 ft-lbs (40 if your rod bolts are 3/8). My service manual did not show a torque sequence for the mains so I used this as I couldn't find any info from google either....

this sequence is from a 1998-05 Infinity, i thought this would be better than just random tightening

Click image for larger version  Name:	download.png Views:	1 Size:	12.5 KB ID:	10528255

To align the cam and crank timing marks:
After mains and rods were torqued, i installed two flywheel bolts. Next i removed the camshaft just far enough to clear the crank's timing gear. I put a pry bar between the two flywheel bolts and spun the crankshaft so the timing mark on the crankshaft gear would be in a position to line up with the timing mark on the camshaft gear. I then spun the camshaft gear until it lined up with the crankshaft gear being very cautious not to nick or scratch the camshaft. When both timing marks lined up i pushed the camshaft back inside the block and tighten the two screws that hold it on.

I hope this made since and is helpful to somebody out there new like me.
 
Last edited:

Goldie627

Lieutenant Junior Grade
Joined
Oct 28, 2013
Messages
1,010
At this point i've pressed in the timing cover seal and i'm ready to install the timing cover. my bro thinks that i can just bolt up the timing cover to the block and the harmonic balancer will just "magically" line up with the timing cover.... me on the other hand, im not so optimistic. there might be 2 to maybe 3 mm that it could potentially be off center and then rub harder on one side of the seal... am i paranoid? is my brother right?

I like dans tape idea but im scared of removing the crankshaft key. any tips for removing the key and reassembly with the tape trick?

are these the right steps?
knock the crank key out with hammer and punch, wrap the crank with tape, install the timing cover


on the timing cover gasket the one between the block and the timing cover.... both sides of this gasket gets rtv?
 
Last edited:

Rick Stephens

Admiral
Joined
Aug 13, 2013
Messages
6,118
At this point i've pressed in the timing cover seal and i'm ready to install the timing cover. my bro thinks that i can just bolt up the timing cover to the block and the harmonic balancer will just "magically" line up with the timing cover.... me on the other hand, im not so optimistic. there might be 2 to maybe 3 mm that it could potentially be off center and then rub harder on one side of the seal... am i paranoid? is my brother right?

I like dans tape idea but im scared of removing the crankshaft key. any tips for removing the key and reassembly with the tape trick?

are these the right steps?
knock the crank key out with hammer and punch, wrap the crank with tape, install the timing cover


on the timing cover gasket the one between the block and the timing cover.... both sides of this gasket gets rtv?

Yah, both sides. Don't tighten past snug until it cures enough not to poop out the gasket.
 

fishrdan

Admiral
Joined
Jan 25, 2008
Messages
6,989
On the 2 cam shaft retaining bolts, I put a drop of lock-tite on them, then snug them up with a manual impact driver (don't go crazy and snap them off) .

For installing the timing cover, don't wrap the crank with tape. Grab a roll of electrical tape, strip off enough tape so the roll fits inside the timing cover seal snug, then slide it onto the crank (timing cover with roll of tape stuck inside the seal). If needed, you may have to put a layer of tape inside the roll of electrical tape, so it's snug on the crank, but I didn't have to. Not 100% accurate, but better than not aligning the timing cover.

Use Perfect Seal or Permatex #3 on the timing cover gasket, RTV at the ends when the oil pan is installed.
 

Goldie627

Lieutenant Junior Grade
Joined
Oct 28, 2013
Messages
1,010
Timing cover went on like a breeze, but im pretty sure i "pooped out" my oil pan gasket :eek:
probably gonna have to redo it :blue:
wAAACH5BAEKAAAALAAAAAABAAEAAAICRAEAOw==
​ maybe you guys could tell me what ya think, ill post some pics, its pretty ugly

:behindsofa:
wAAACH5BAEKAAAALAAAAAABAAEAAAICRAEAOw==


rick and dan.... i went and worked on the boat today before i could read your new messages :faint2:
wAAACH5BAEKAAAALAAAAAABAAEAAAICRAEAOw==


On a positive note, i think i figured out some of my mistakes...
 

Goldie627

Lieutenant Junior Grade
Joined
Oct 28, 2013
Messages
1,010
centering the timing cover...

20180110_133418.jpg

20180110_133954.jpg
 

Attachments

  • 20180110_131654.jpg
    20180110_131654.jpg
    419.1 KB · Views: 1

Goldie627

Lieutenant Junior Grade
Joined
Oct 28, 2013
Messages
1,010
cleaning the rtv that squeezed out from under the main bearing cap that was installed yesterday. the two tiny rectangle cavities have to be clear so fresh rtv and the rear rubber oil pan seal can fit well...

20180110_185359.jpg

20180110_191006.jpg
 

Attachments

  • 20180110_185701.jpg
    20180110_185701.jpg
    614.7 KB · Views: 0

Goldie627

Lieutenant Junior Grade
Joined
Oct 28, 2013
Messages
1,010
adding the rtv...

Click image for larger version  Name:	20180110_193241.jpg Views:	1 Size:	547.2 KB ID:	10528479

Click image for larger version  Name:	20180110_194352.jpg Views:	1 Size:	559.7 KB ID:	10528480

too much? too little? should i have smoothed the bead out before installing the oil pan?

my dummy pegs didn't work out, i couldn't get the pan on with the pegs so i took them out to install the pan
 

Attachments

  • 20180110_193241.jpg
    20180110_193241.jpg
    547.2 KB · Views: 0

Goldie627

Lieutenant Junior Grade
Joined
Oct 28, 2013
Messages
1,010
instead of weather stripping adhesive i used permatex high tack gasket sealant, my downfall was not letting it cure more before installing the pan... i should have waited til it was sticky to the touch but didn't stick to my finger...

plus, like rick said "Don't tighten past snug until it cures enough not to poop out the gasket"

Click image for larger version  Name:	20180110_193429.jpg Views:	1 Size:	583.5 KB ID:	10528484Click image for larger version  Name:	20180110_194320.jpg Views:	1 Size:	585.9 KB ID:	10528485

Click image for larger version  Name:	20180110_210124.jpg Views:	1 Size:	413.0 KB ID:	10528486
 
Last edited:

Goldie627

Lieutenant Junior Grade
Joined
Oct 28, 2013
Messages
1,010
i'm embarrassed to post the pics of how it came out, but if i could help one person not make the mistakes i did its worth the humiliation :joyous:

20180110_205737.jpg20180110_205749.jpg

20180110_205742.jpg20180110_205754.jpg
 

Goldie627

Lieutenant Junior Grade
Joined
Oct 28, 2013
Messages
1,010
more carnage...

Click image for larger version  Name:	20180110_205802.jpg Views:	1 Size:	346.2 KB ID:	10528493Click image for larger version  Name:	20180110_205814.jpg Views:	1 Size:	416.6 KB ID:	10528494

Click image for larger version  Name:	20180110_205840.jpg Views:	1 Size:	557.3 KB ID:	10528495

should i take off the oil pan and redo it with a new gasket?
 
Top